This guide contains details of how to fit an MG7 grille to a Rover premium bumper which may help those of you considering doing this mod, and is intended for use on a MK 2 car.
It gives added detail and pictures to the other excellent how to done by Devilish on this forum " Premium-MG7-Roewe750-Bumper-Supplier-and-Fitting-Guide " which you may also wish to refer to
premium-mg7-roewe750-bumper-supplier-and-fitting-guide-t2819.html
With thanks to Devilish for providing his garage, and Woolleysox for letting us use his bumper and grille for the pictures.
Sourcing all the bits you need for the bare bumper can be a stumbling block
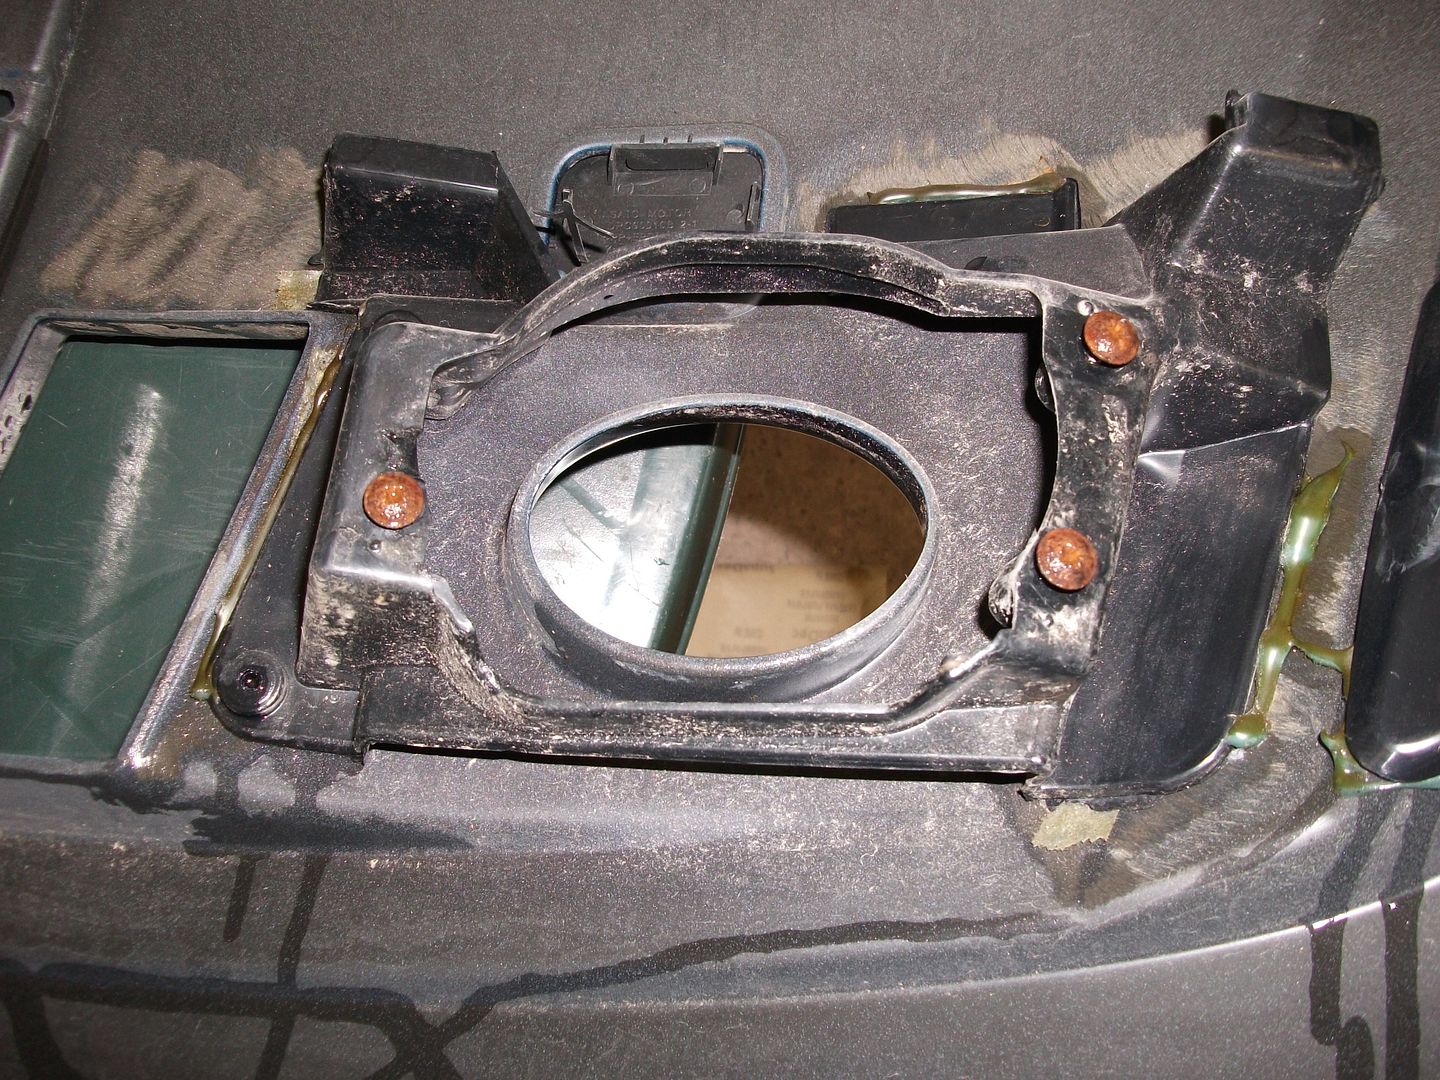
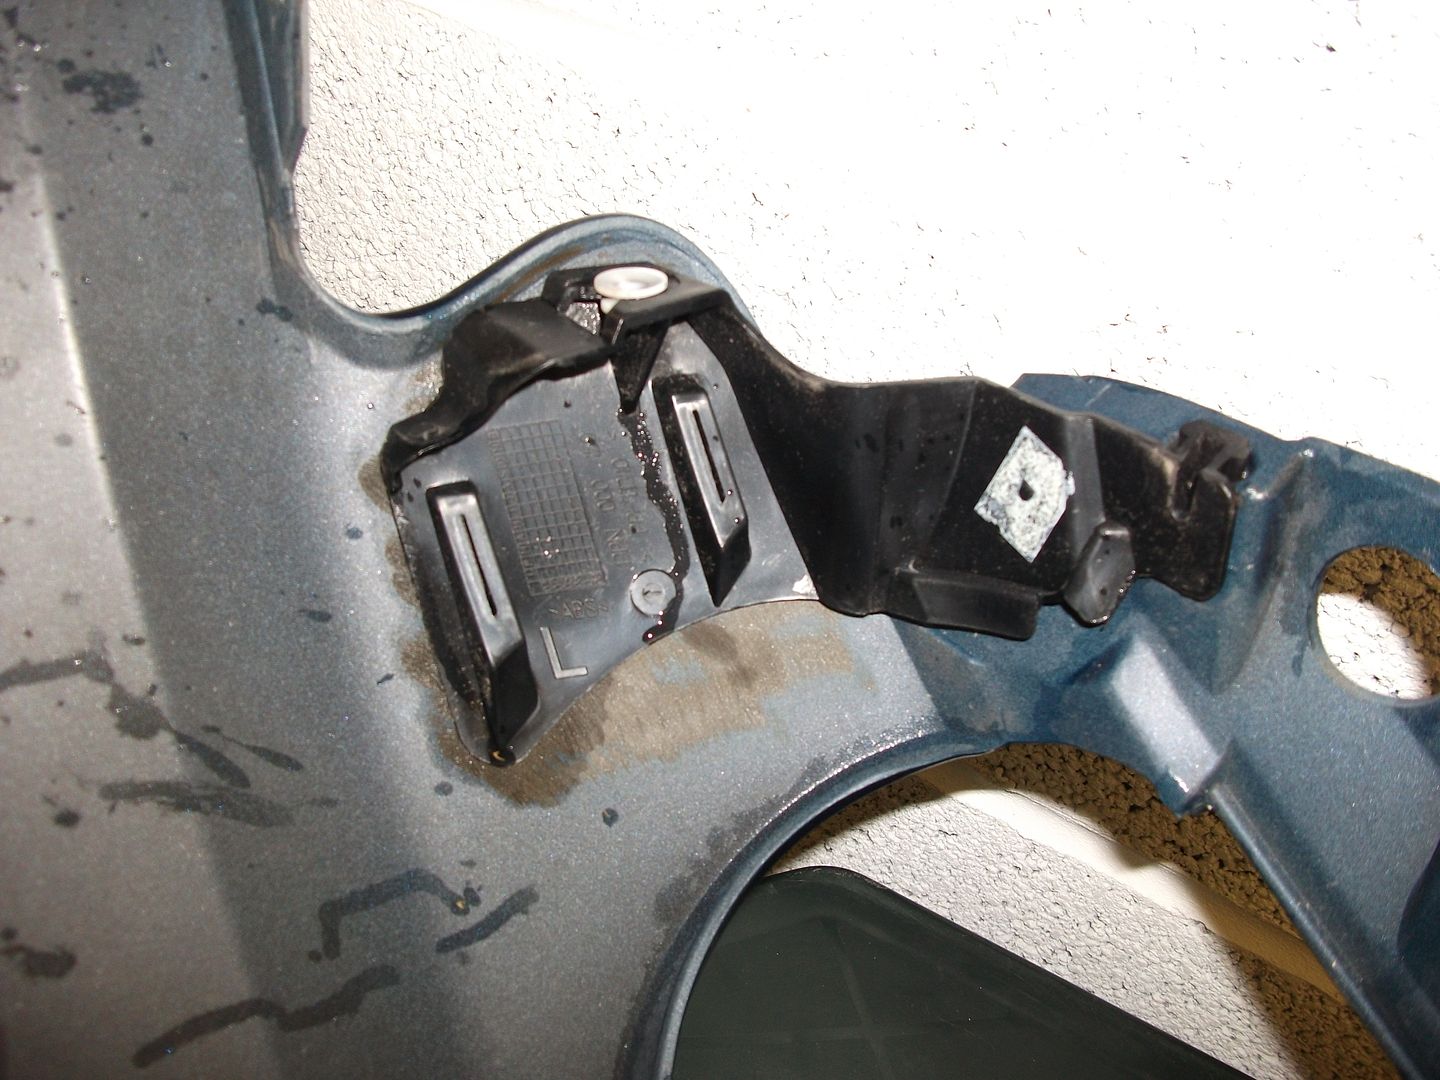
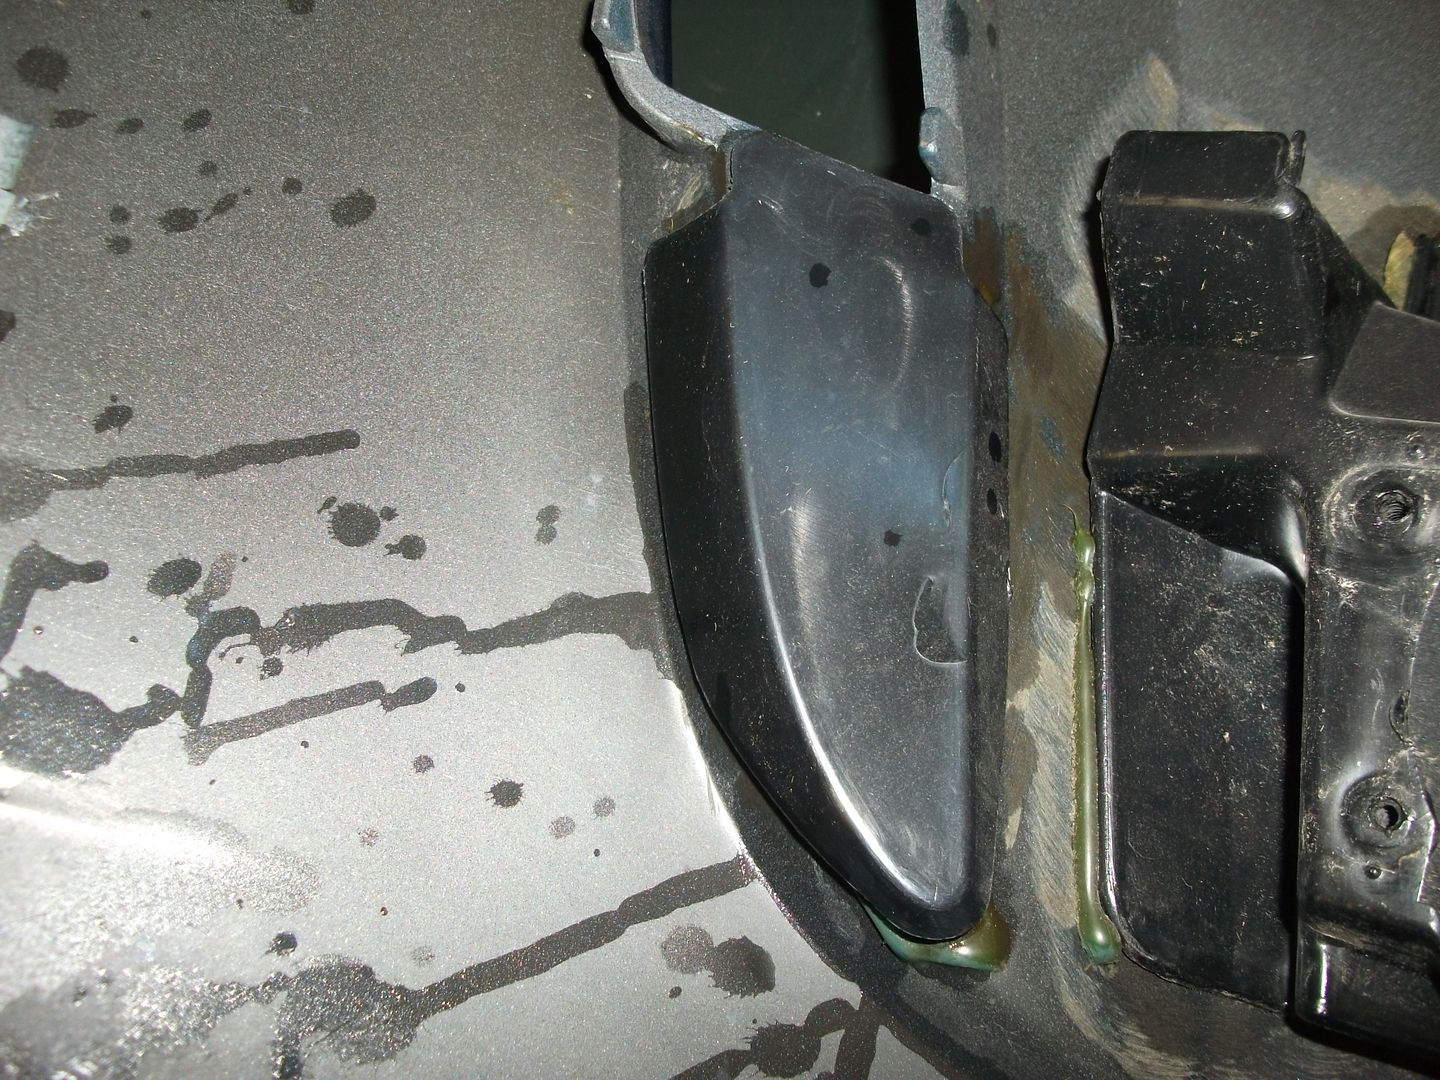
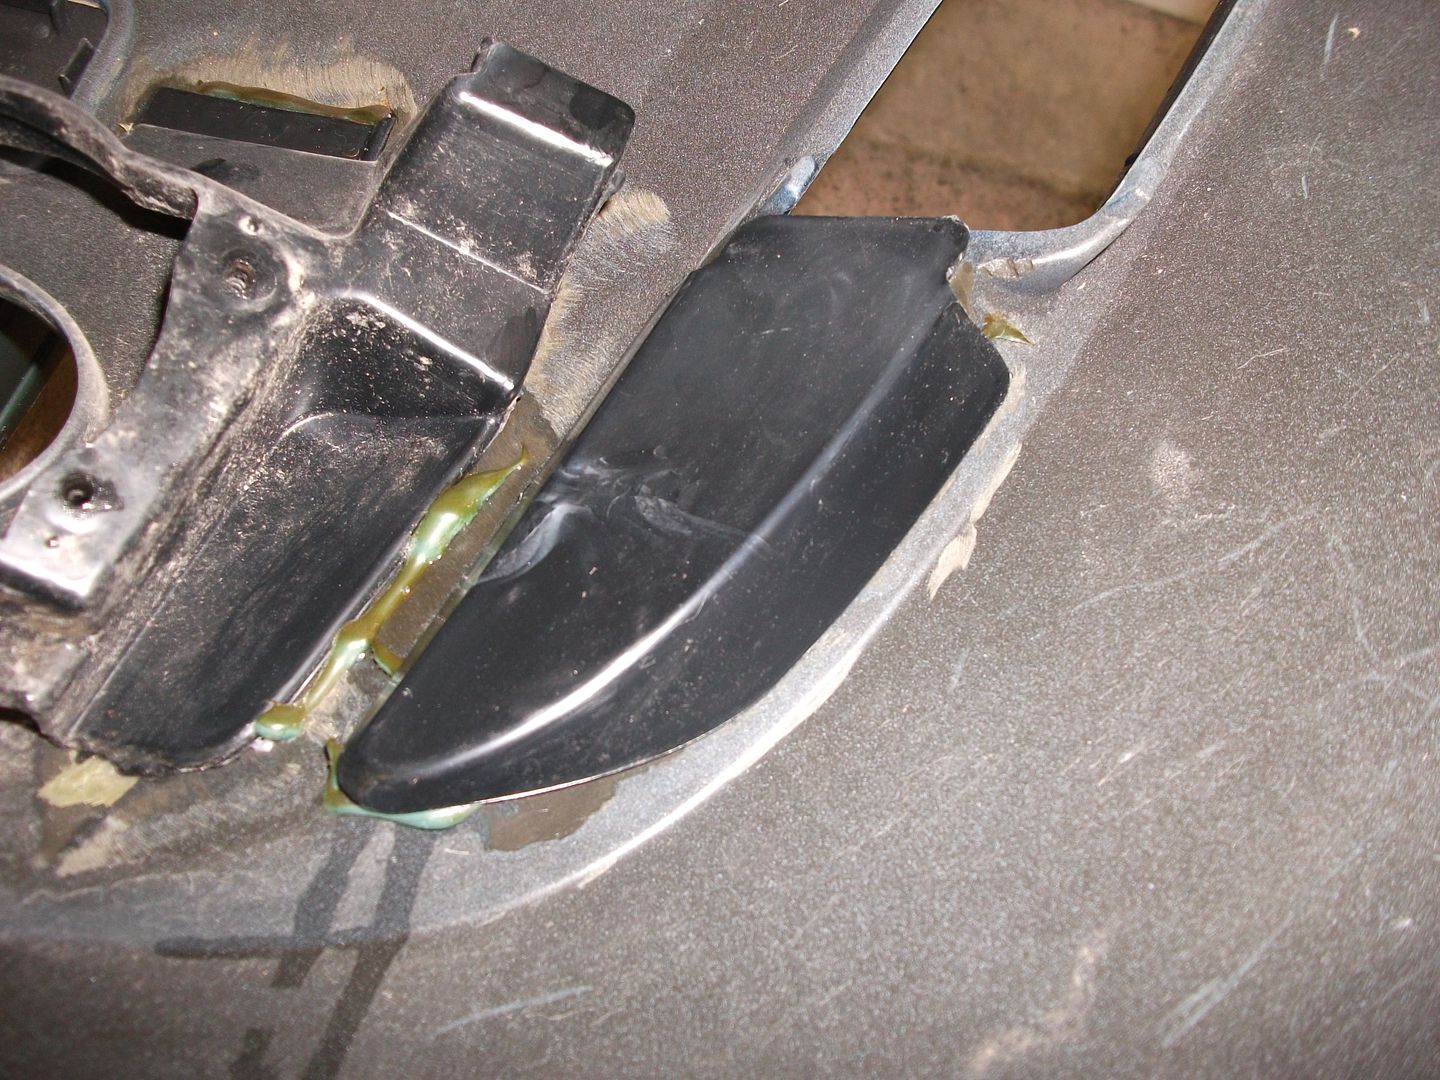
First of all a couple of pictures of the hard to get fog mounts for the bumper, which are not normally in place when you buy a bare bumper unless you are lucky. Rover breakers at Middlewich have one side only for sale, and some members intend to fabricate their own although I don’t believe as yet anyone has done so

The fir tree clip brackets are also usually missing from the bare bumper although these are still available from Rover Breakers at Middlewich
Next the blanking plates that sit underneath the indicators but as these are a flat fit at the back and other plastic could be used or even mesh
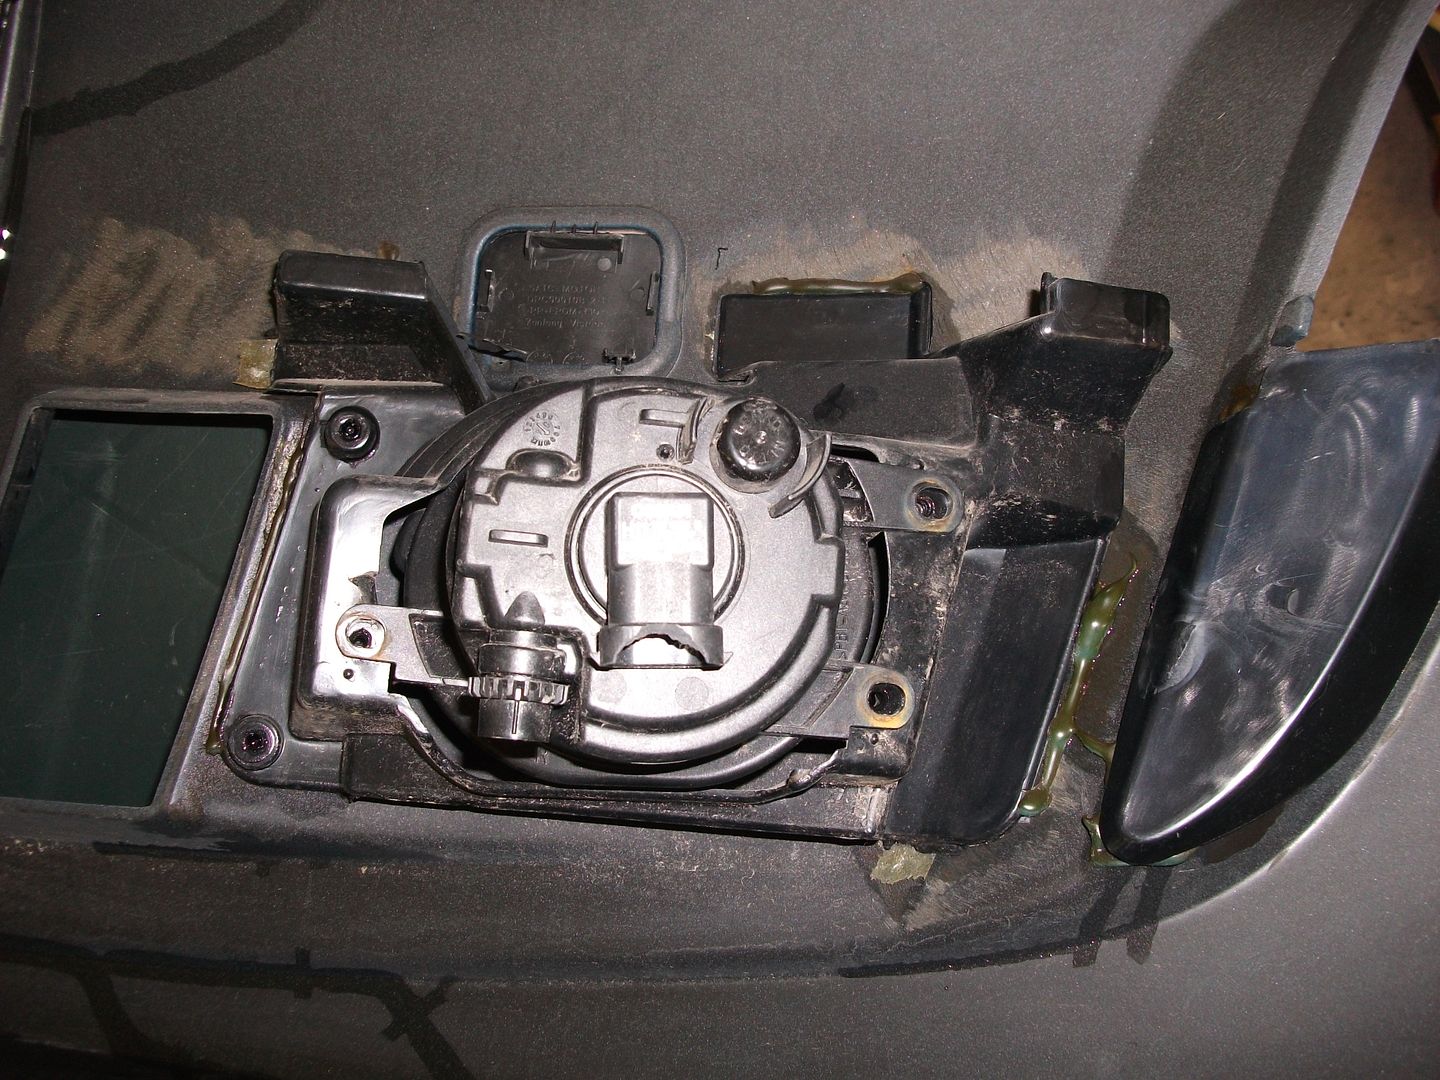
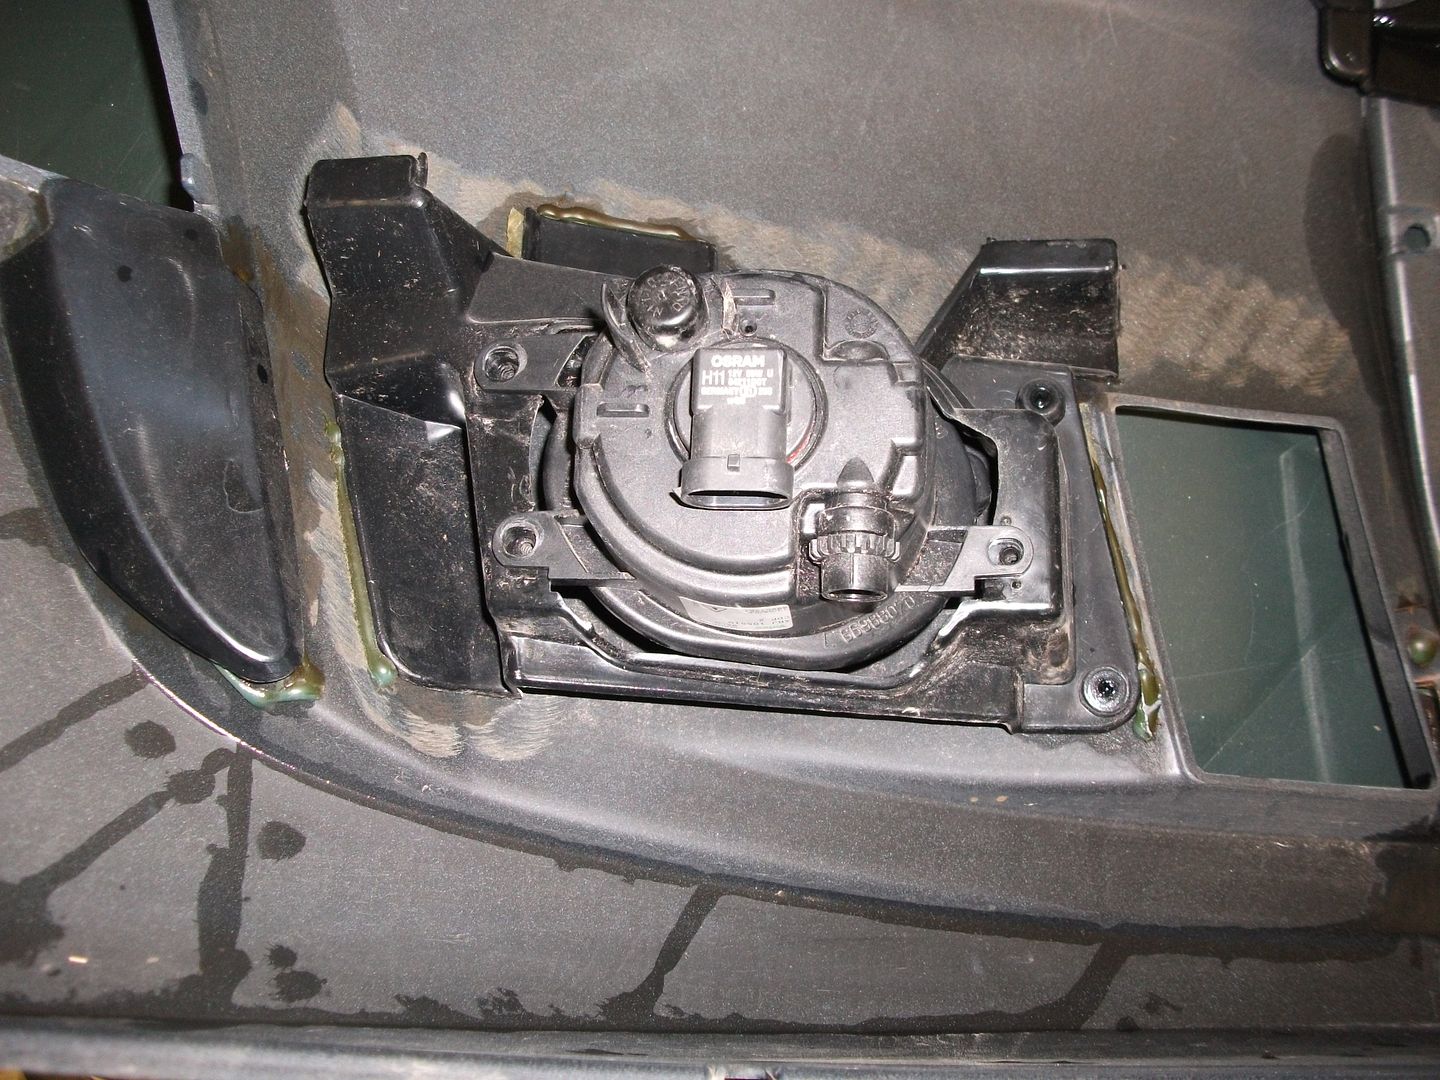
You will need MK2 fog lights to sit in the fog mounts
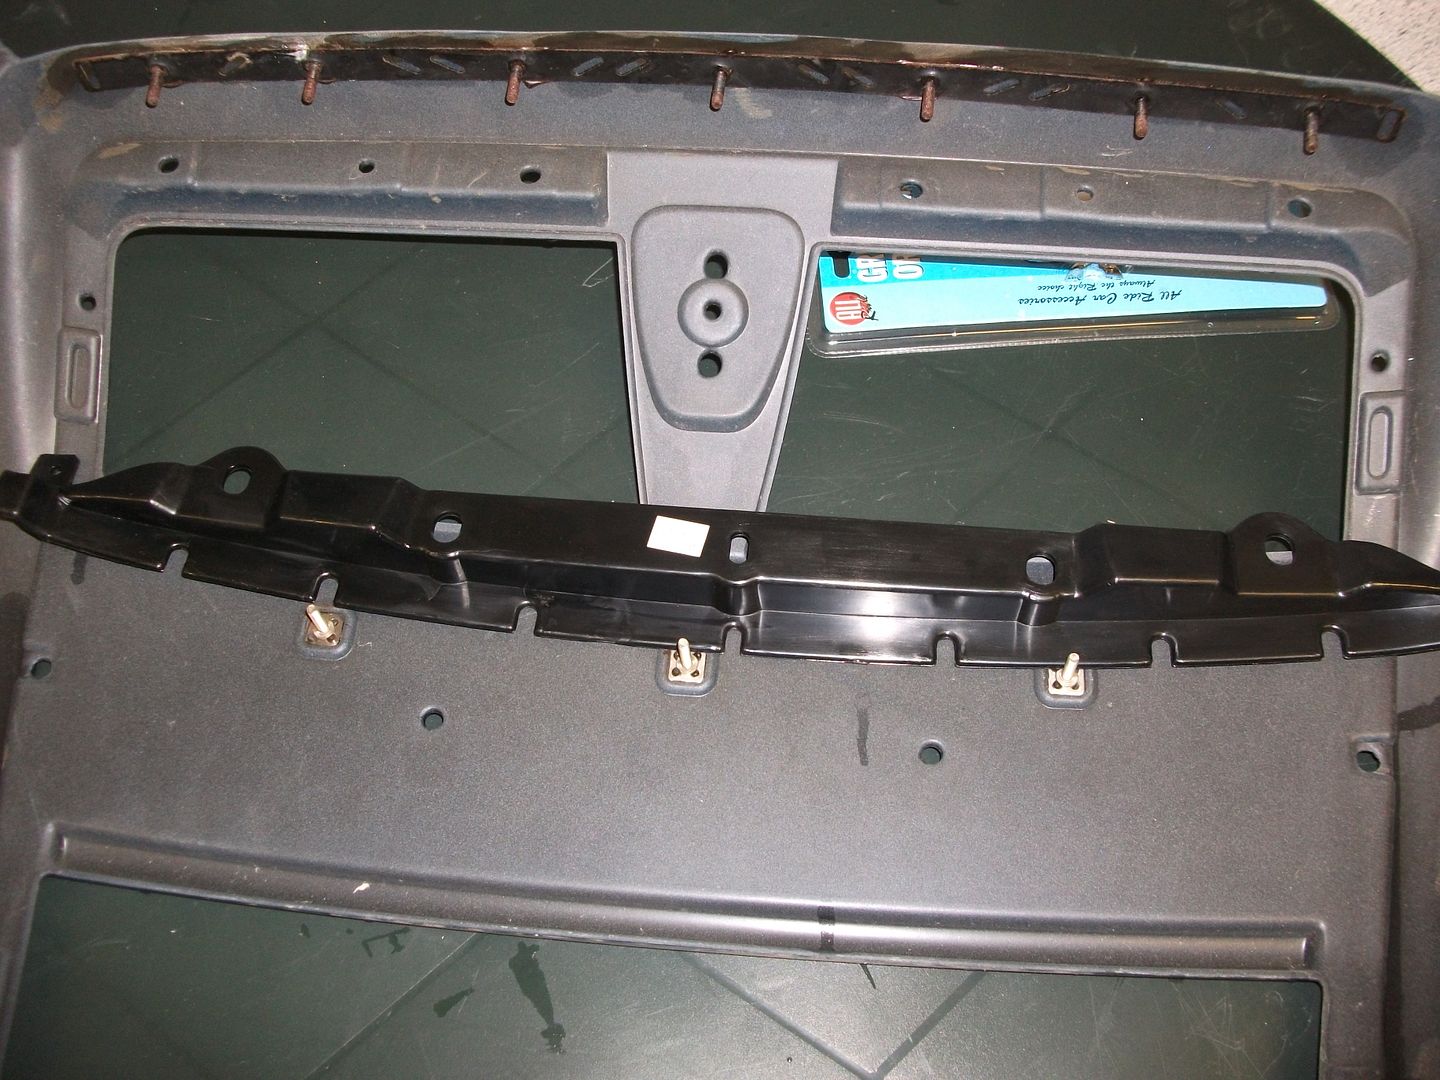
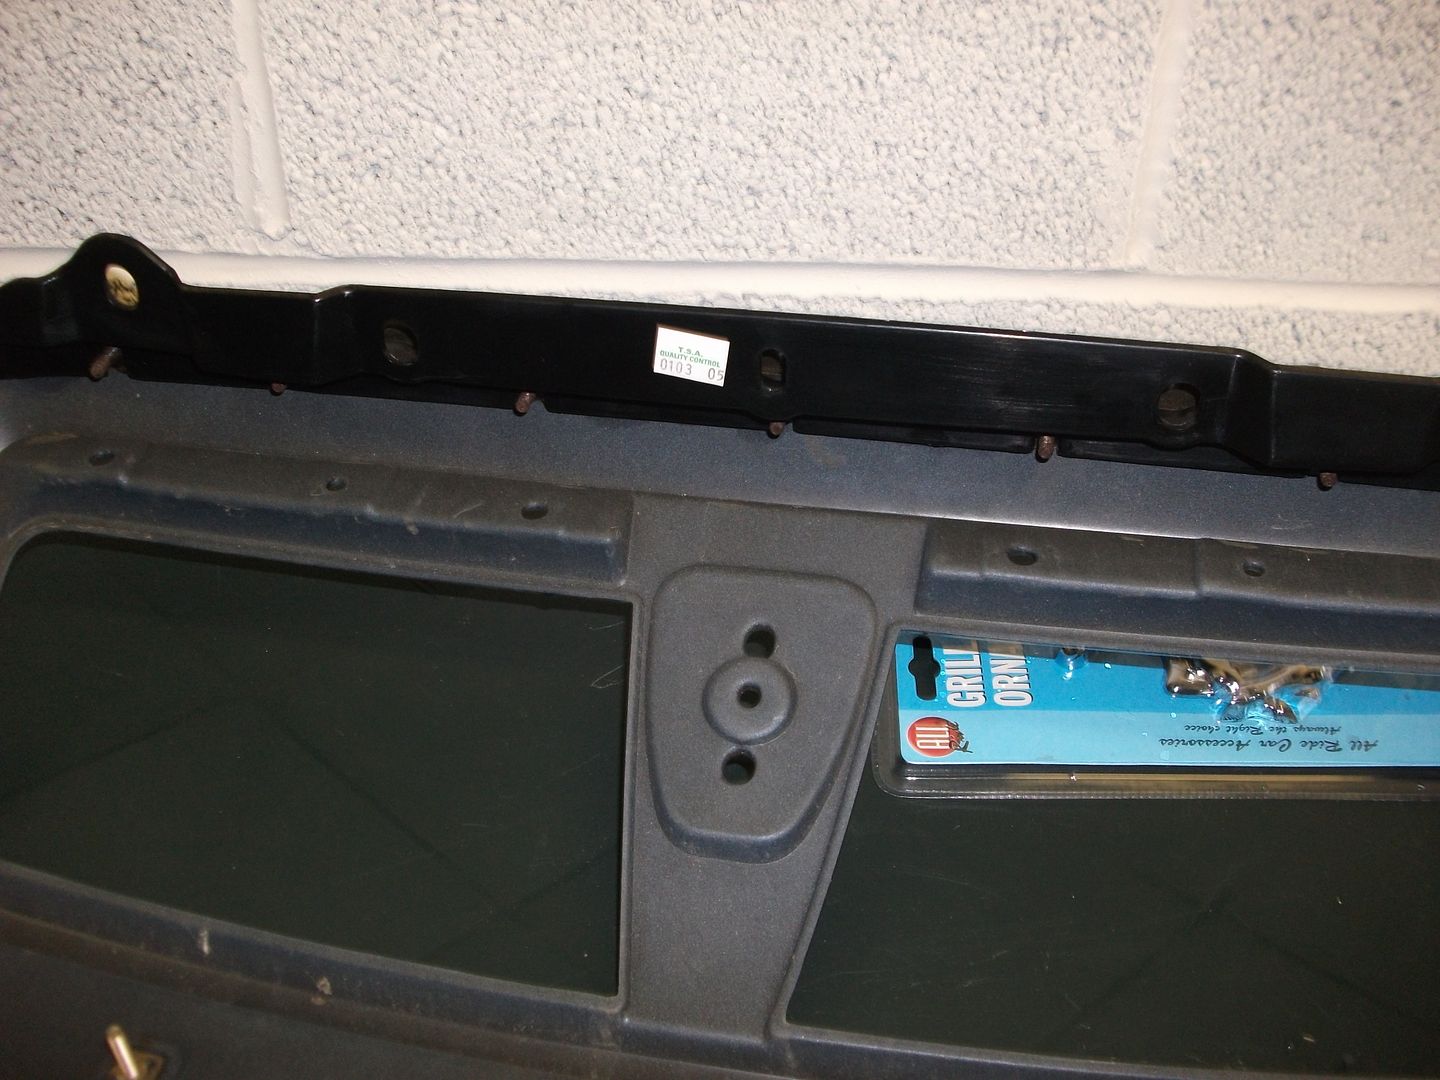
And the plastic section that fits in the top of the bumper ( available from Lakeland Minis )
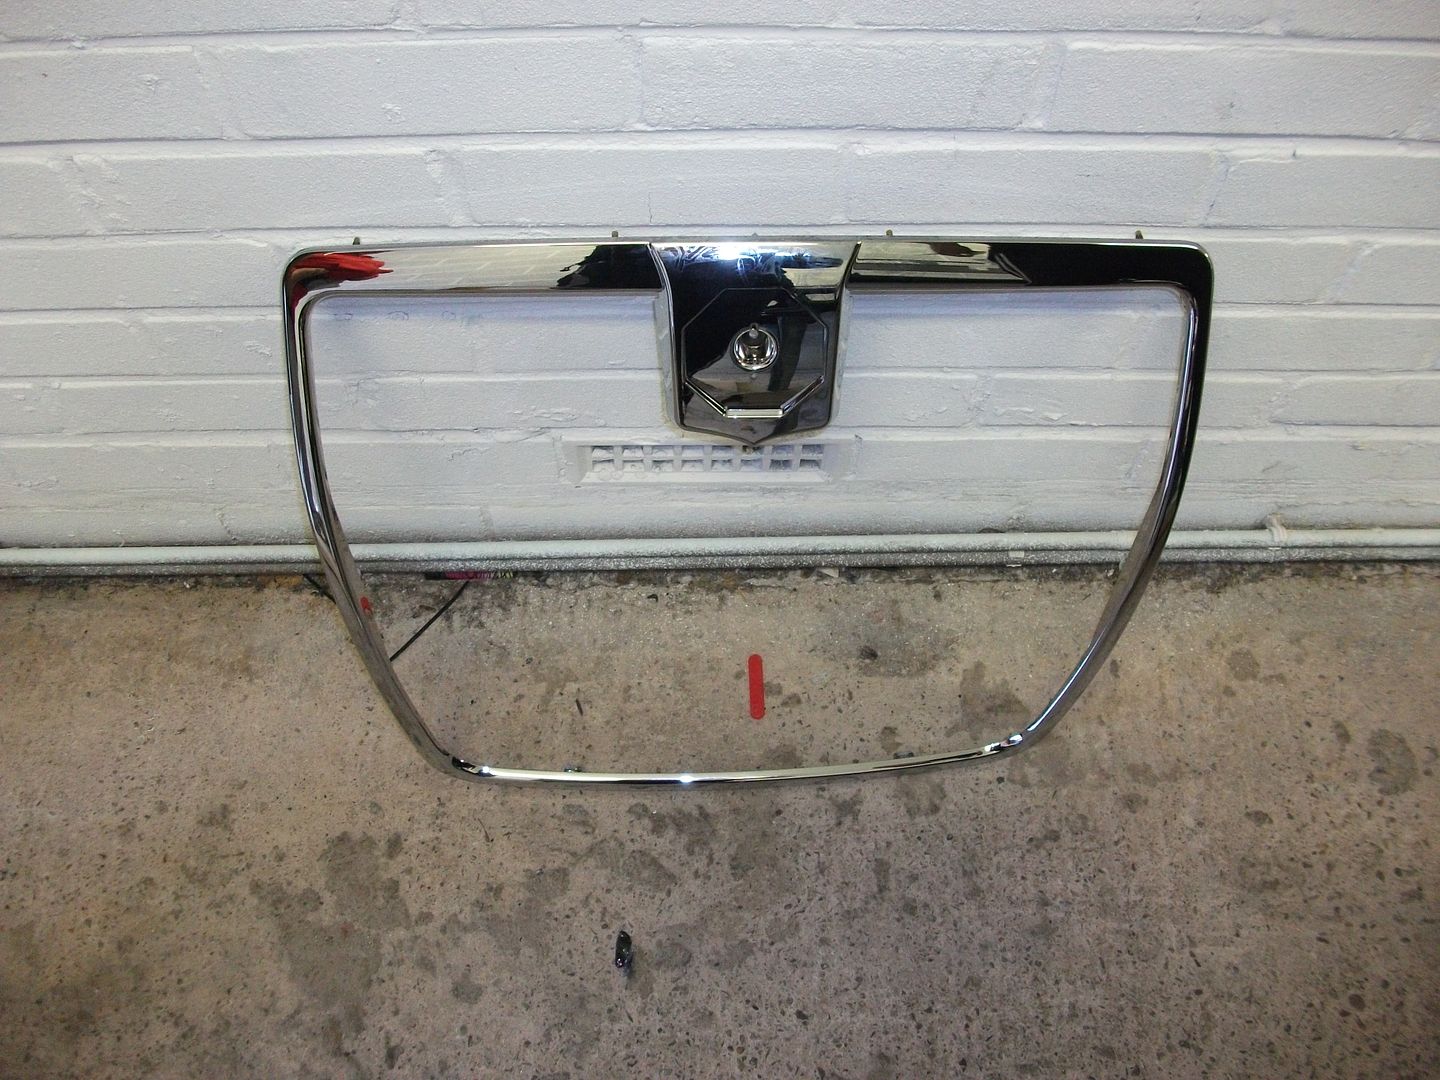
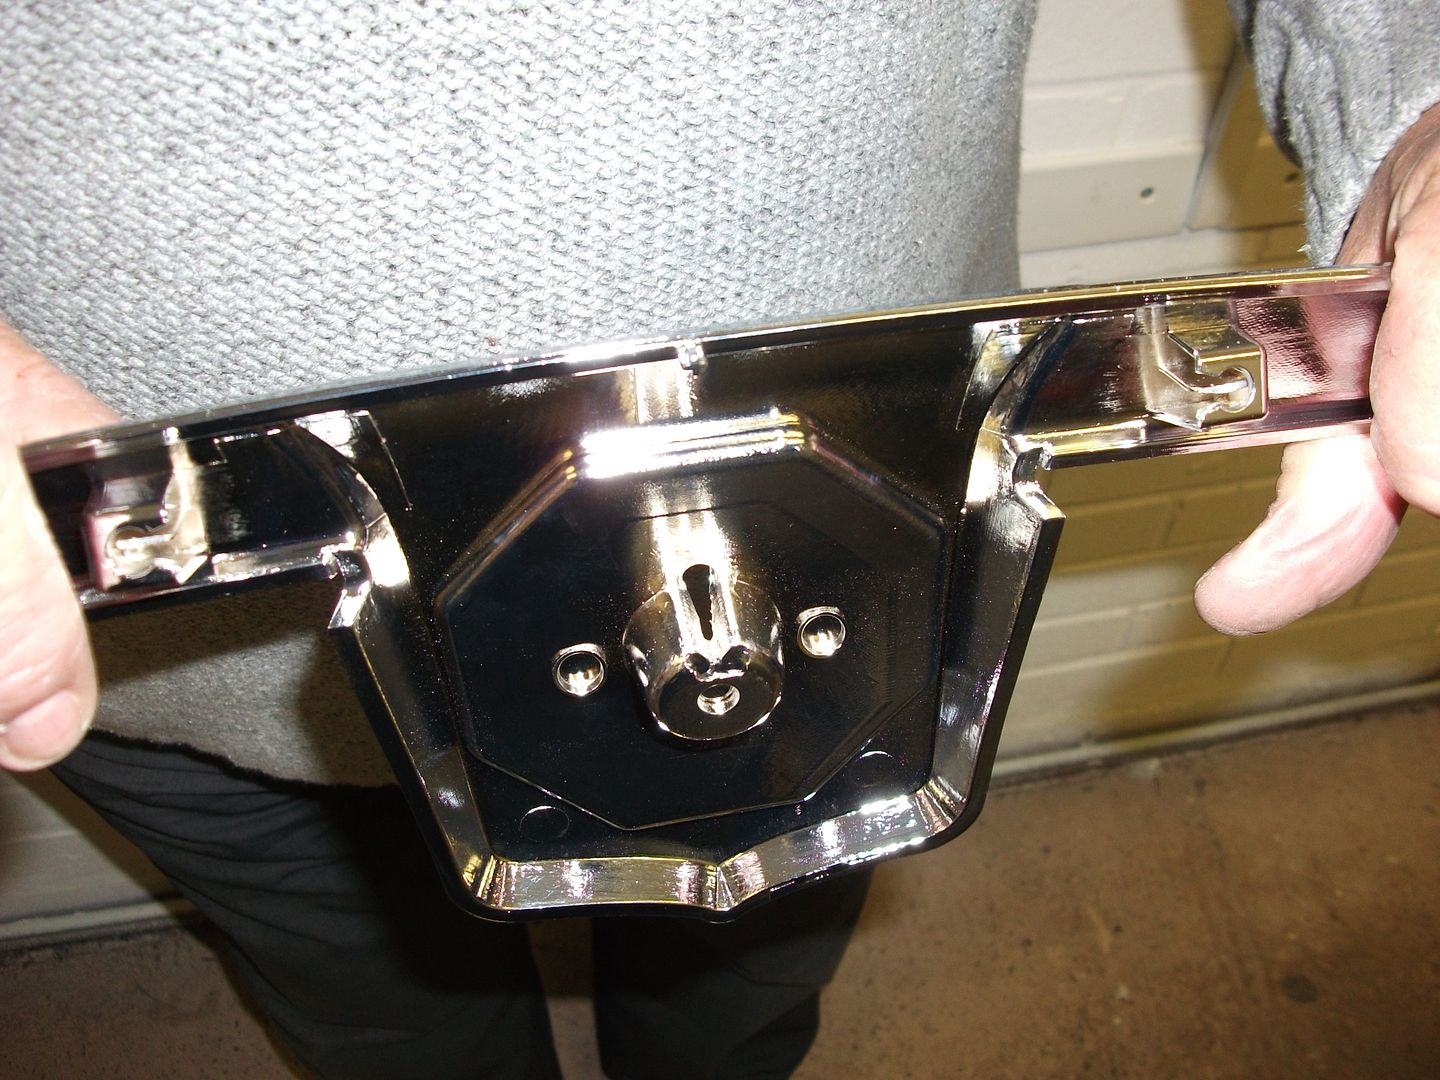
The Mg 7 Grille comes with all 4 plastic grilles that sit behind the bumper, this is the chrome outer grille
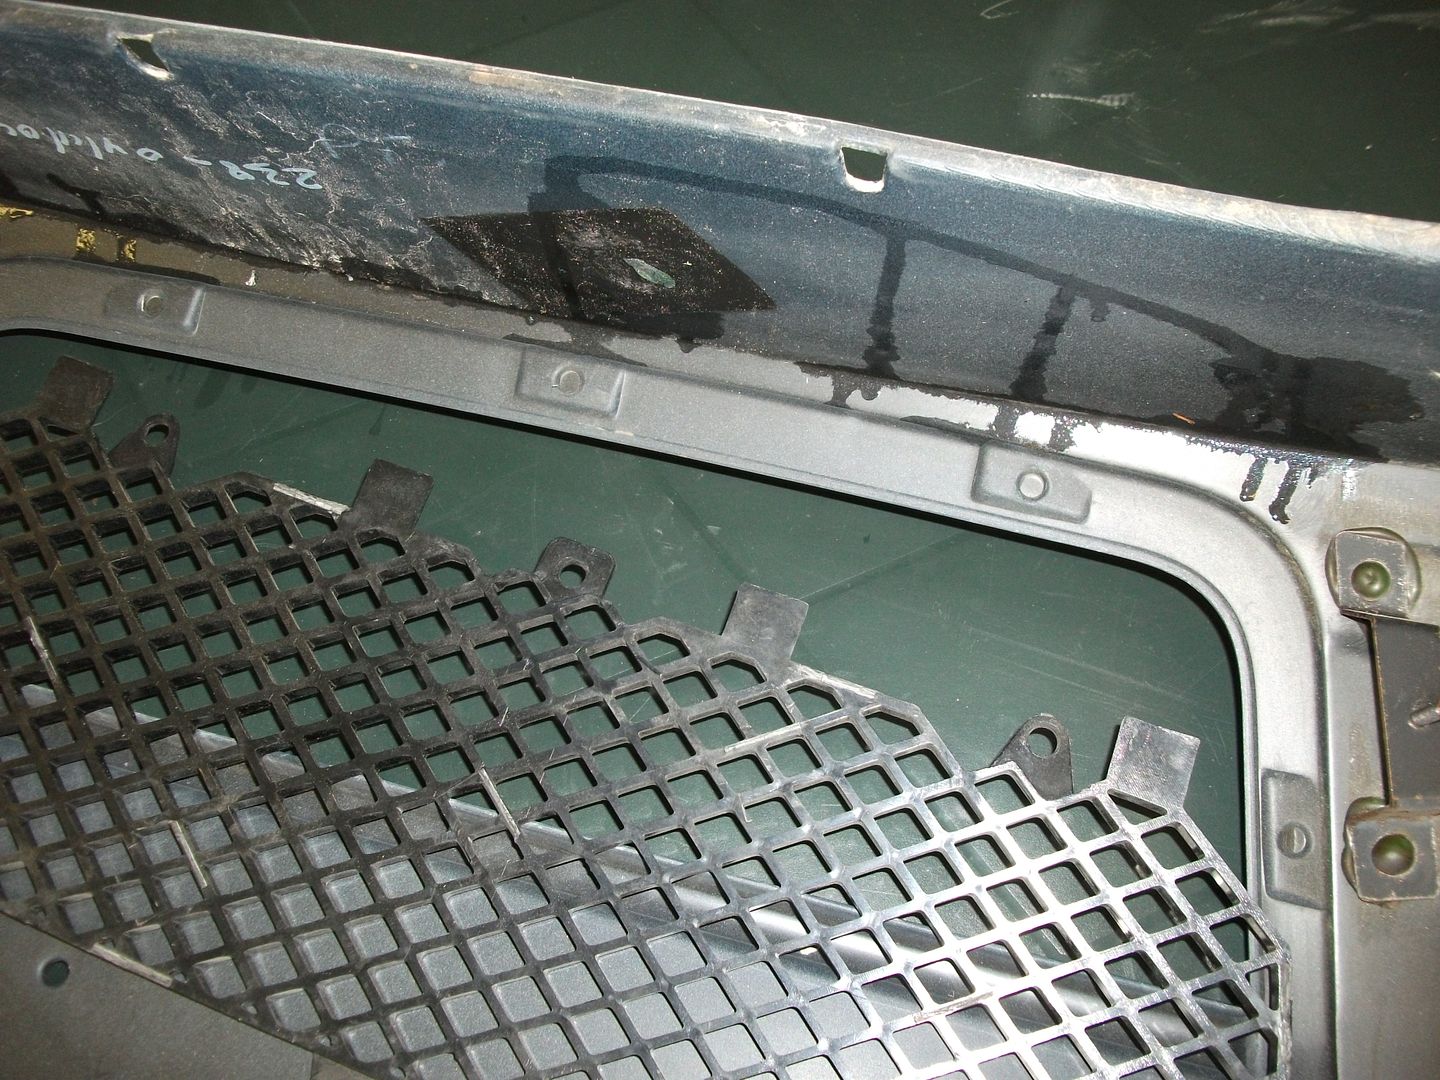
and these are the 2 larger plastic bumper mesh grilles

The plastic bumper mesh grilles are easy to fit as follows:
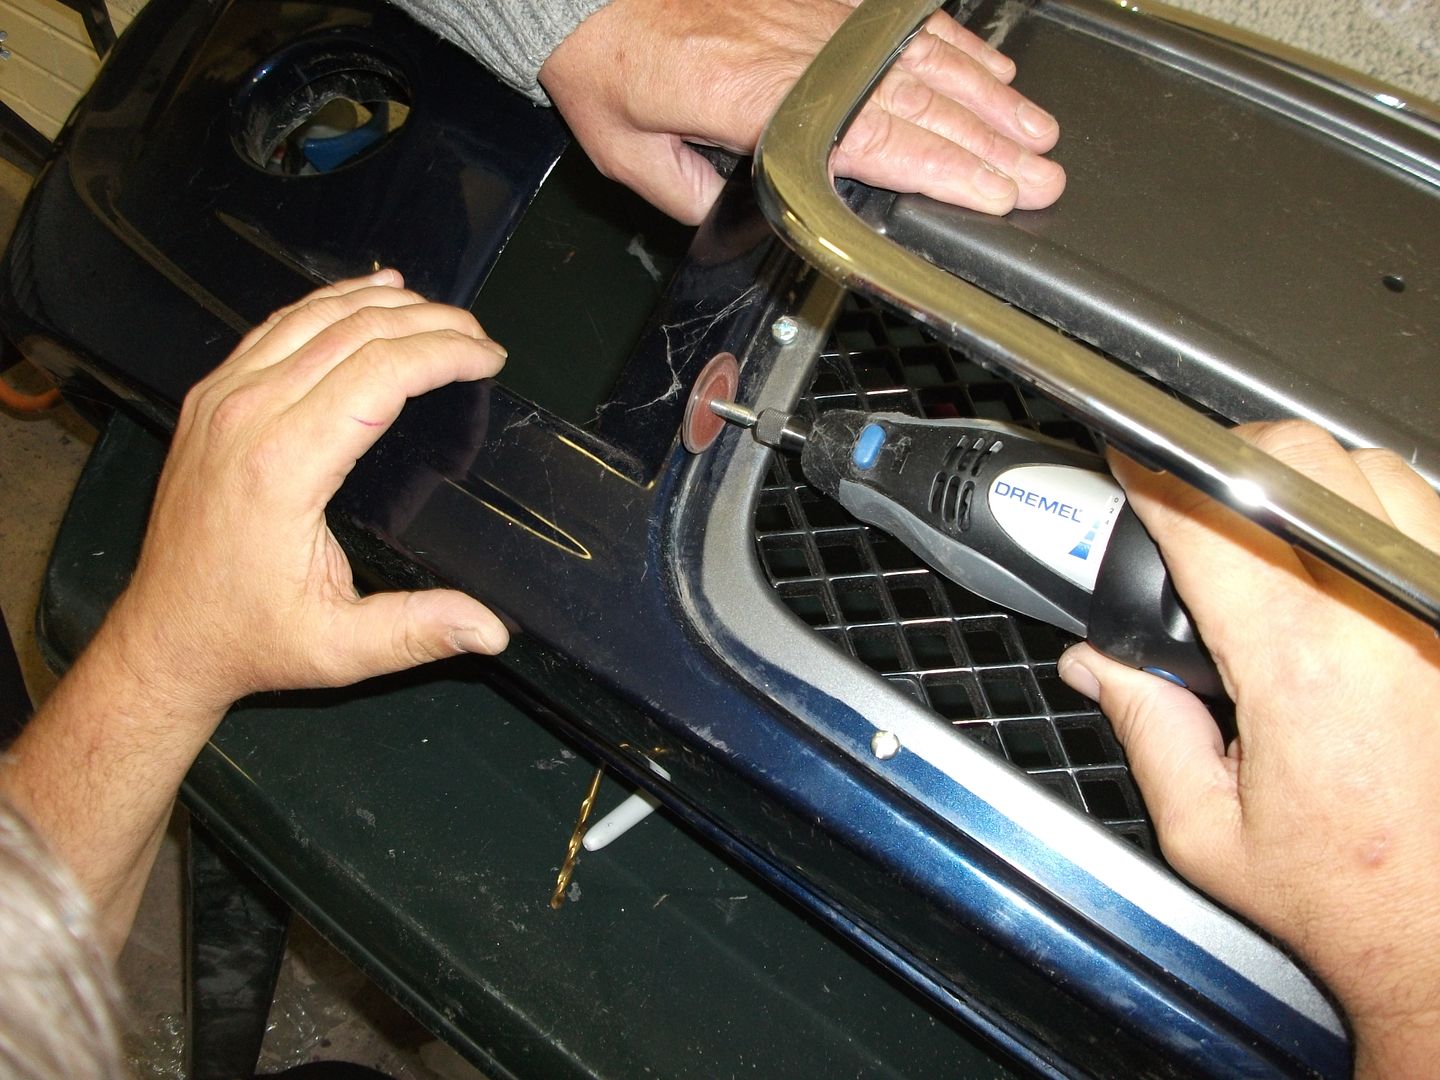
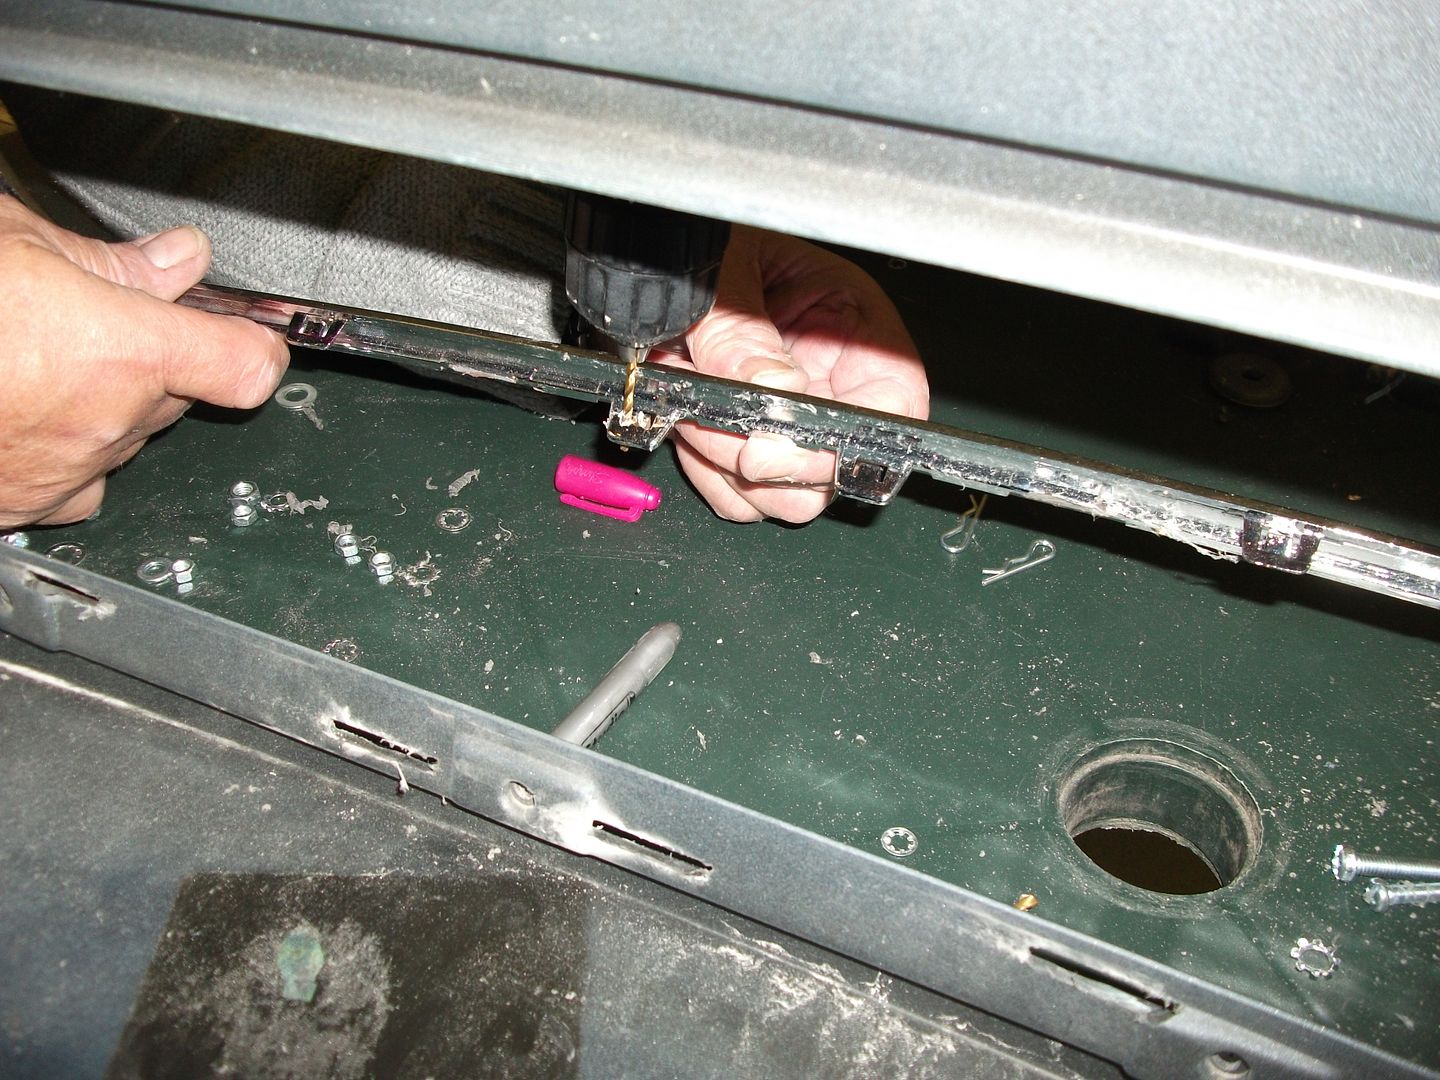
The lower grille will fit into the bumper once the marked holes in the bumper are drilled, use small nuts and bolts ( brass best ) with washers to secure the grille, the bolt is visible from the front of the bumper but will be covered by the chrome grille when fitted
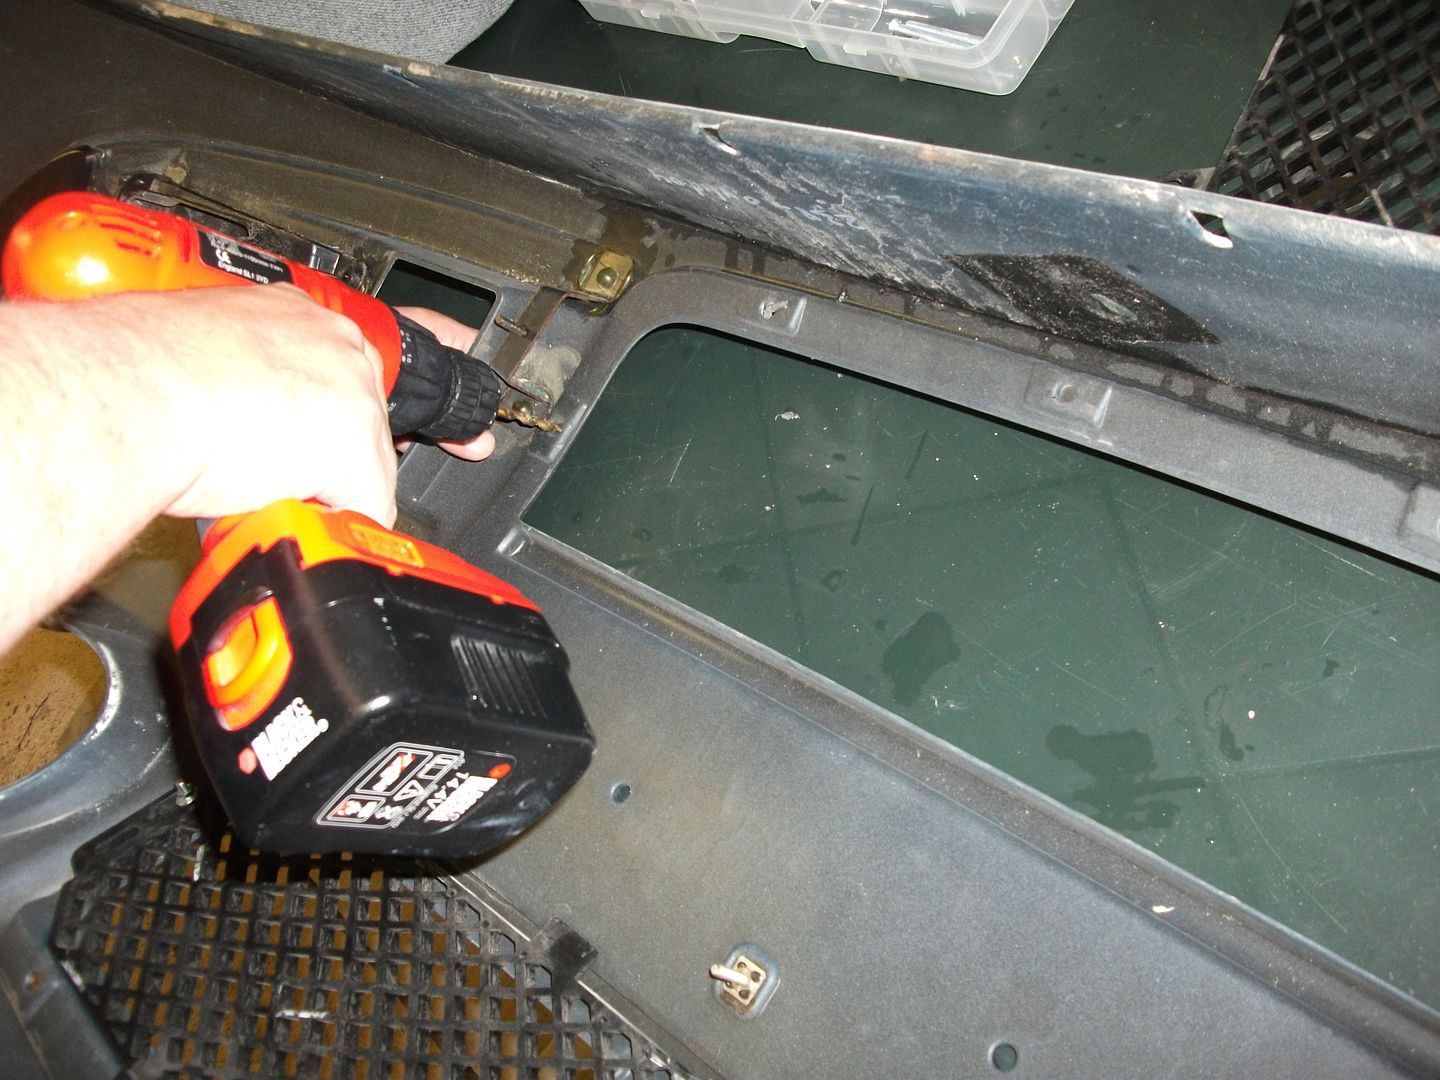
The top grille will fit straight in without any drilling and will be secure enough without making any extra holes at the bottom of it

With both grilles fitted they look like this on the inside
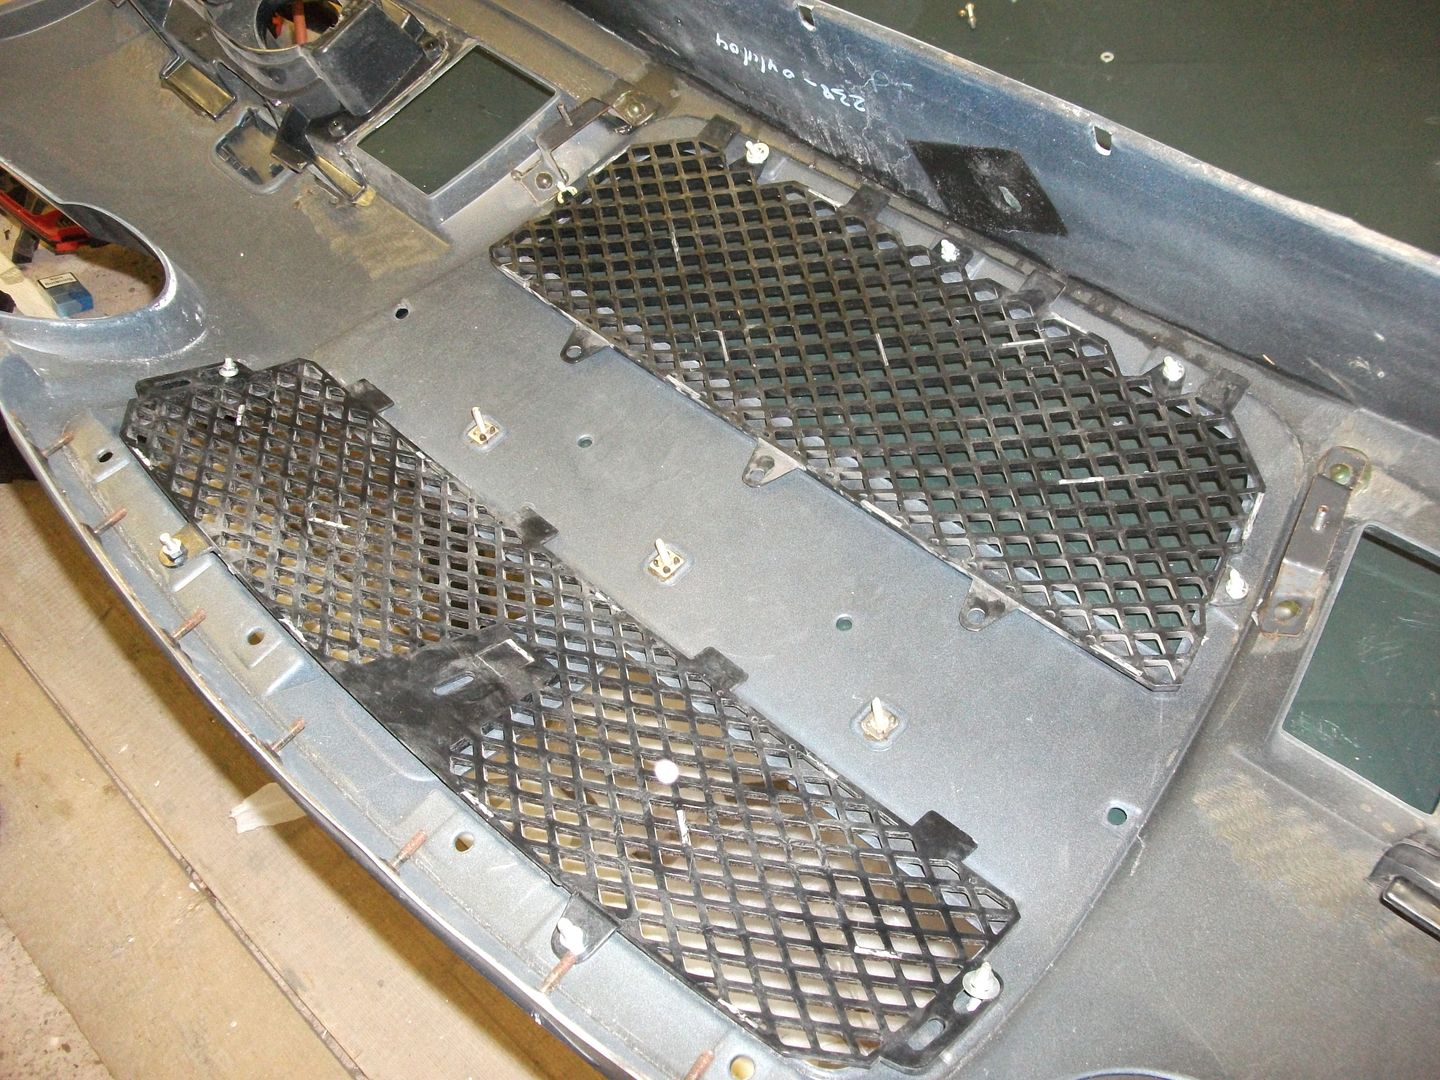
And like this from the front, note the visible bolt heads that will be covered by the chrome grille when fitted
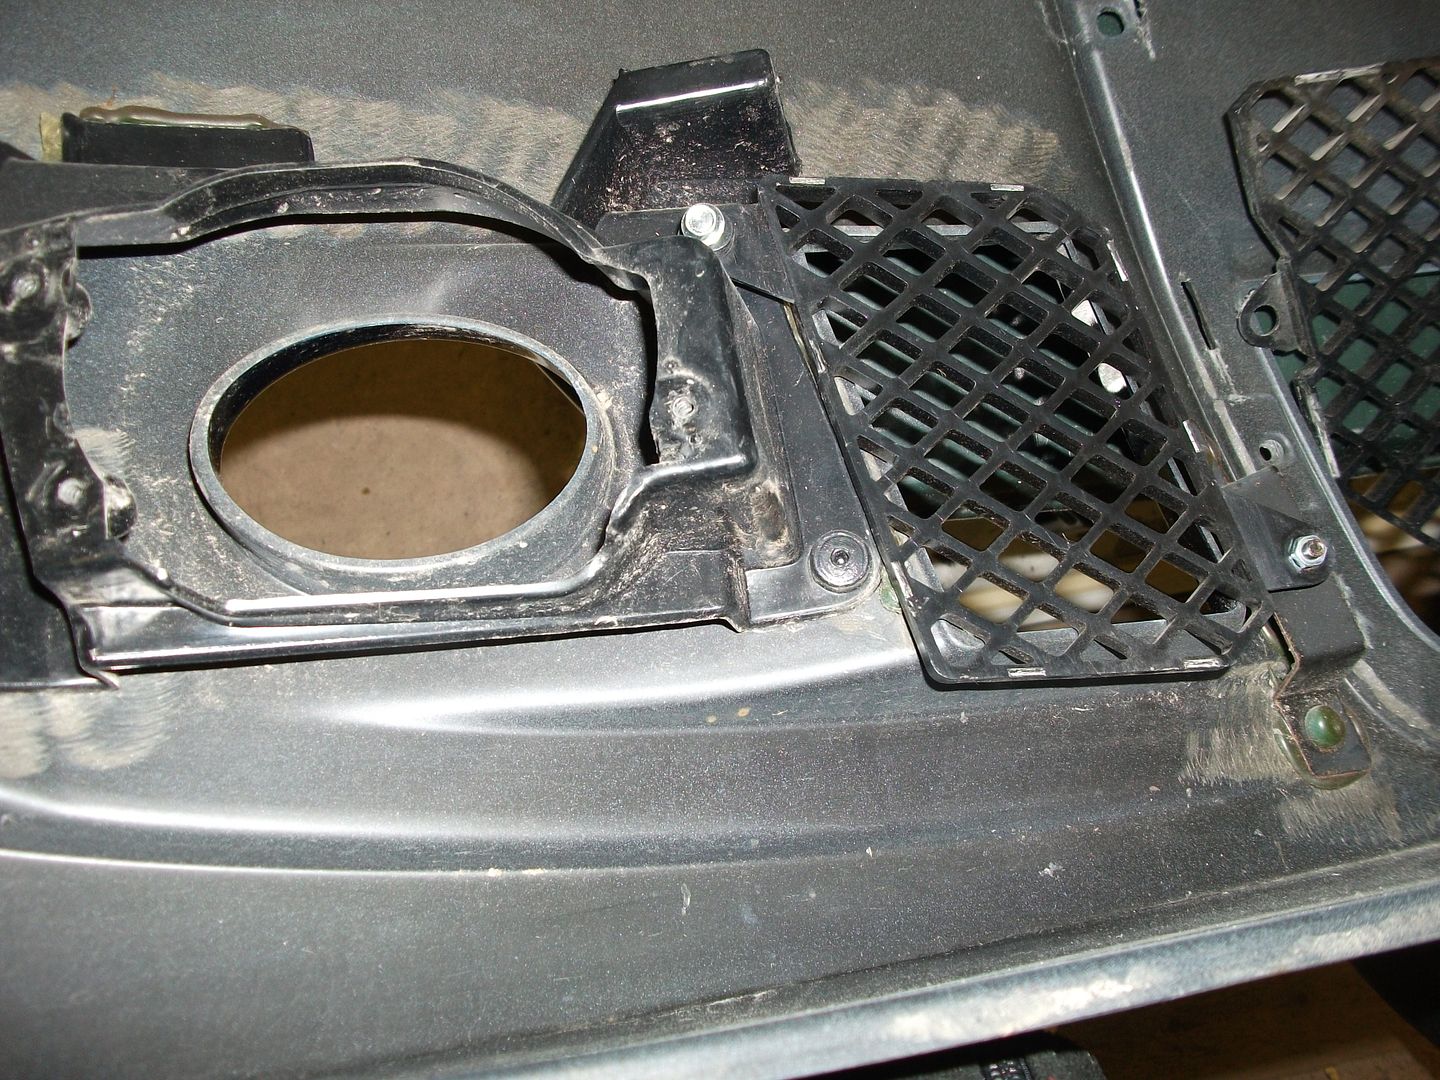
The smaller grilles that sit next to the fog lights have 2 locating holes, one fits into a bracket already in place on the bumper and the other via a self tapping screw into a corner of the fog mount. If your bumper does not have the metal bracket than it will be easy to fix this in place by making a bracket or maybe glueing

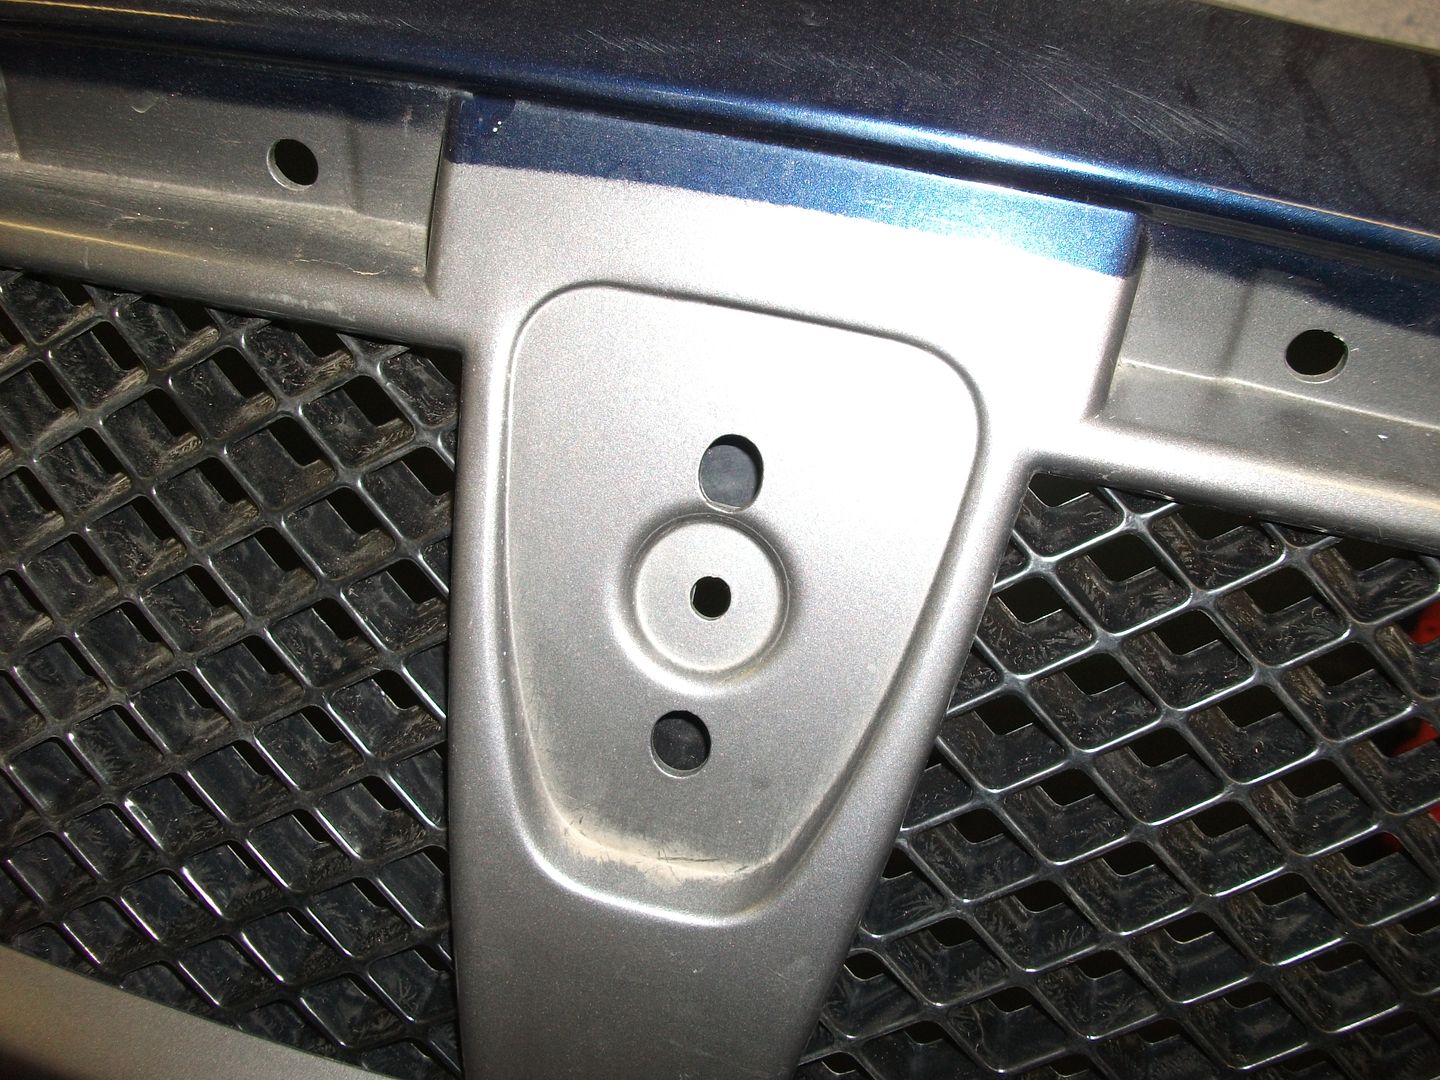
The chrome grill is a bit more tricky as although it fits the bumper perfectly size wise some of the fixings are different
The back of the grille top will not fit the hole in the bumper so to get a perfect fit use the right size hole cutter to make the hole in the bumper bigger
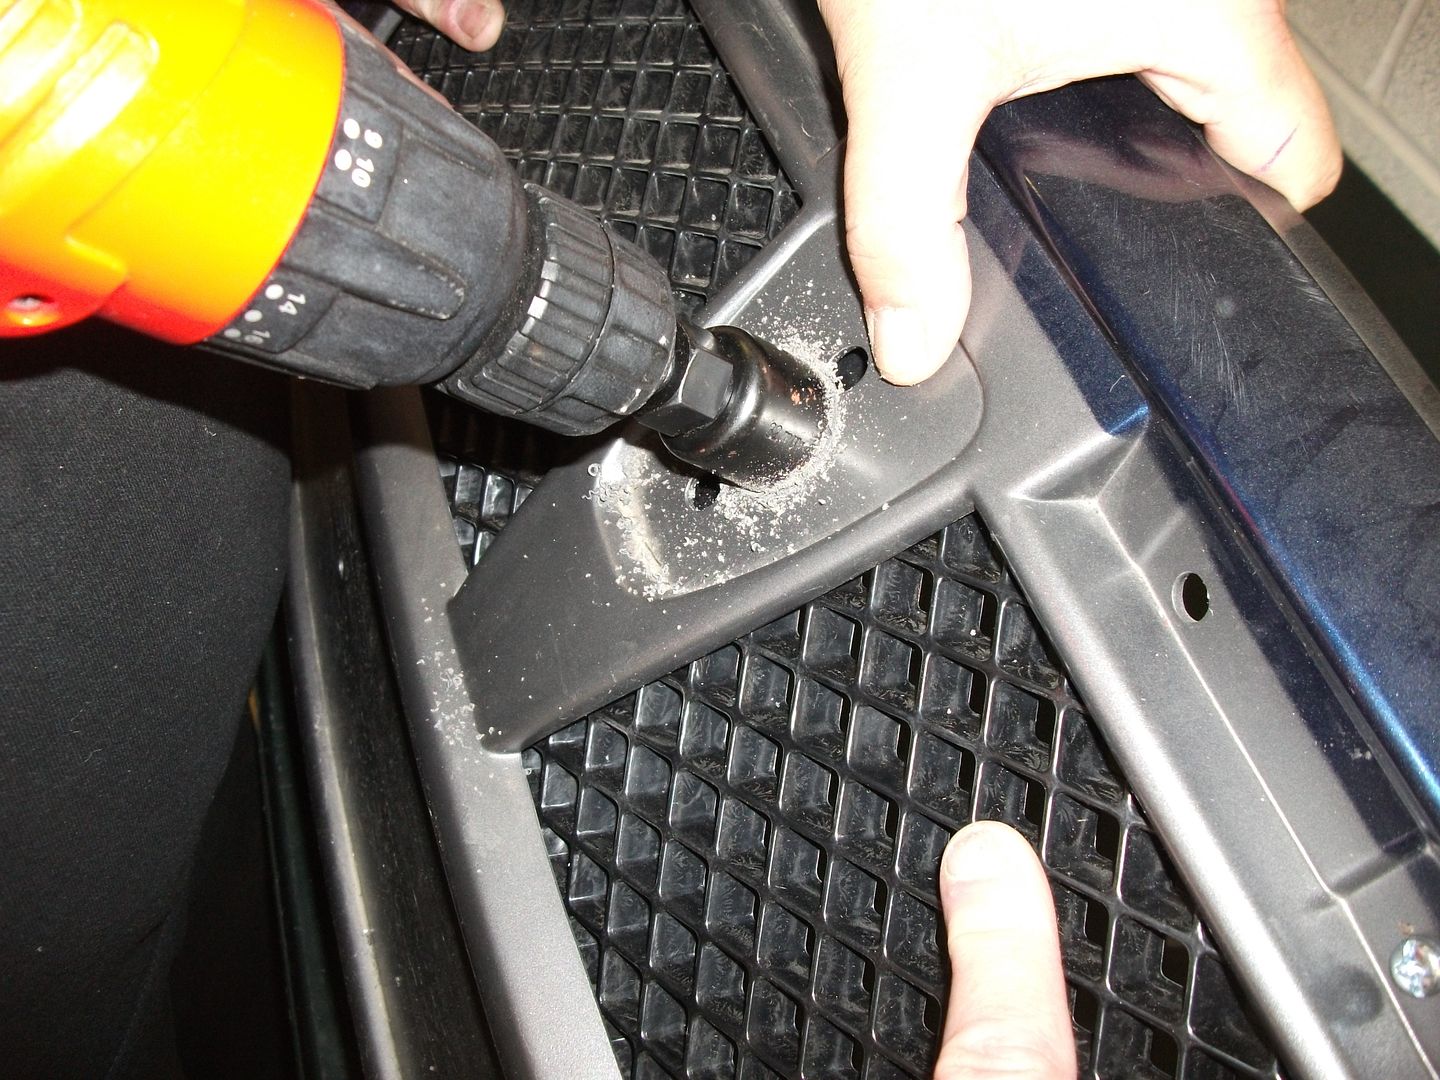
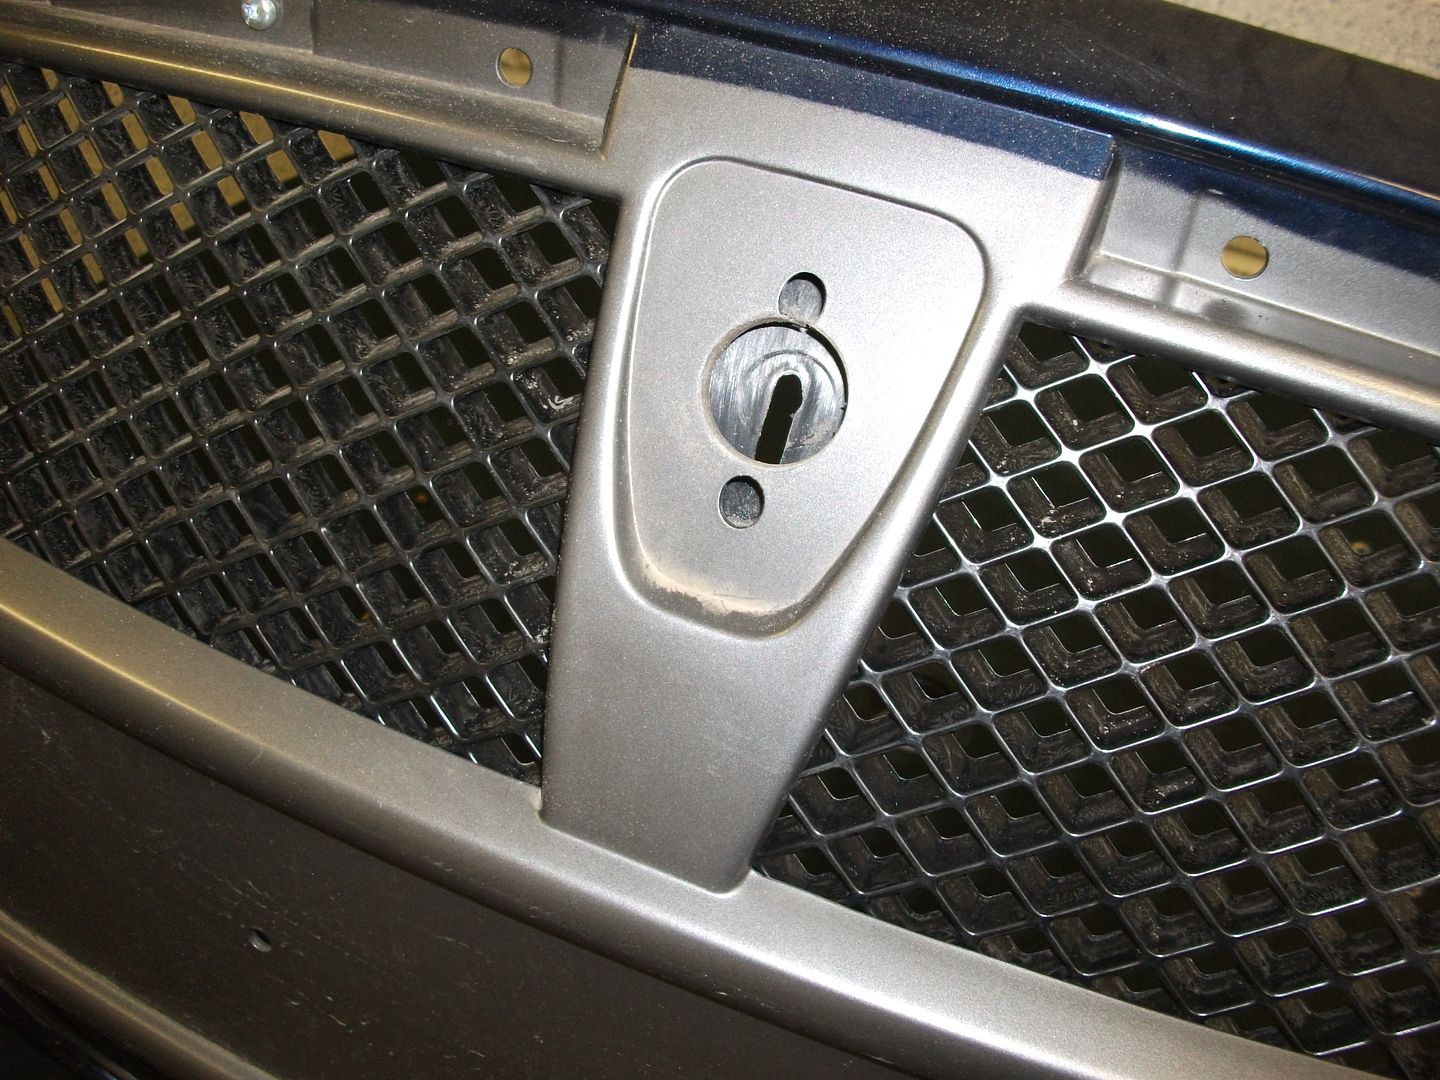
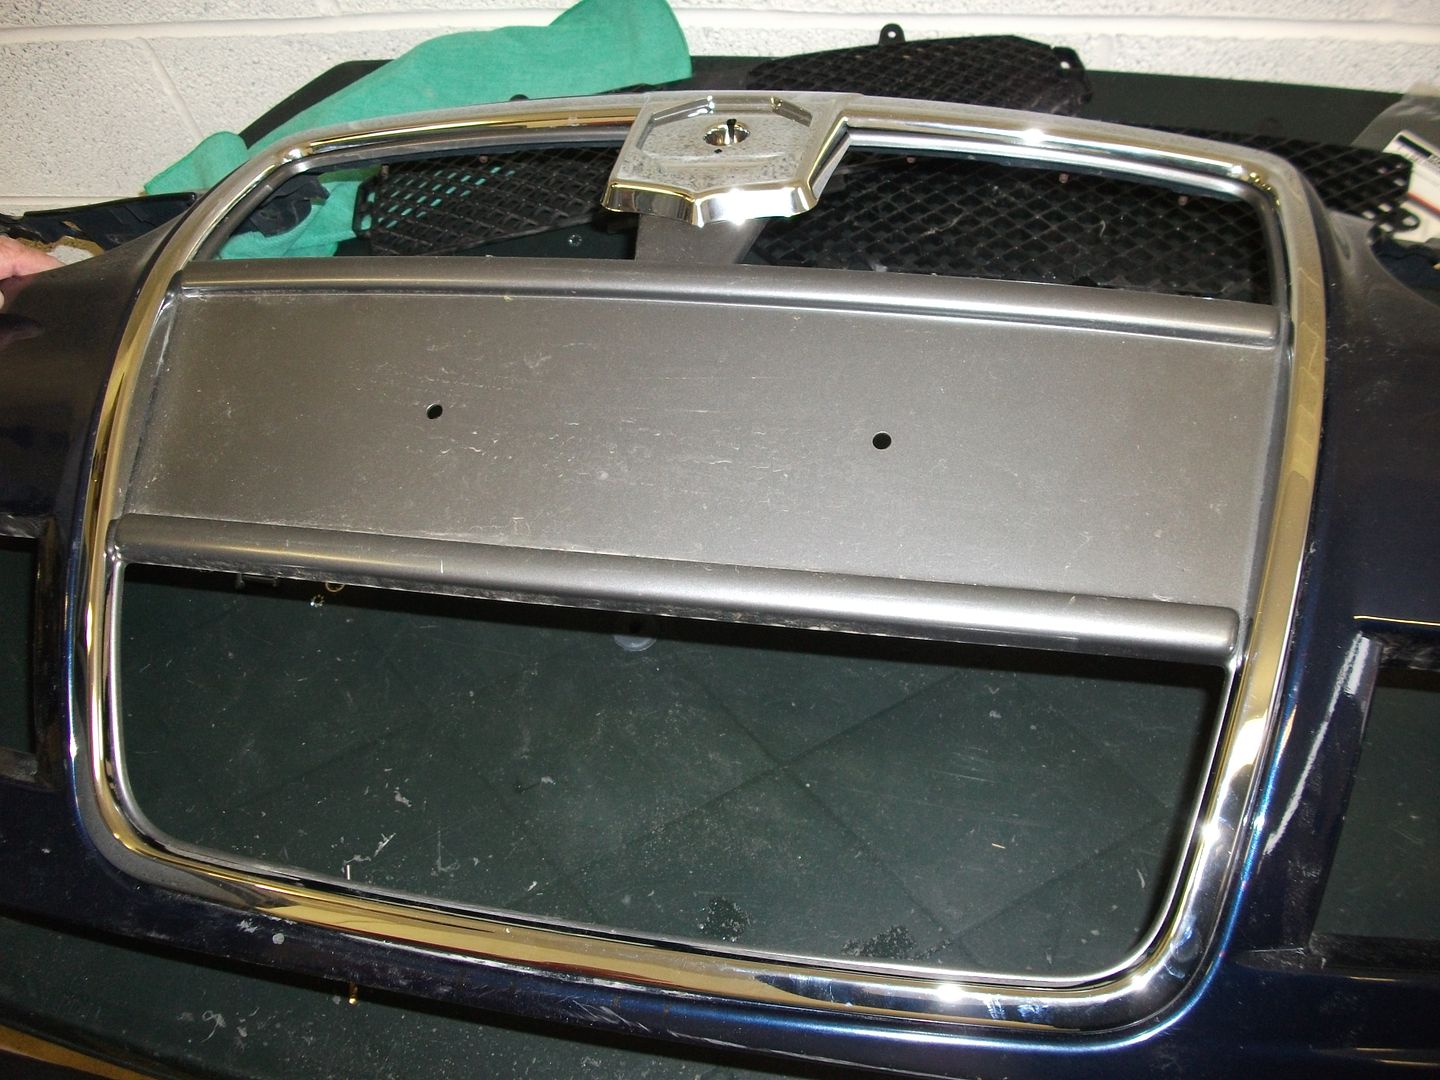
It now looks like this with the hole cut out
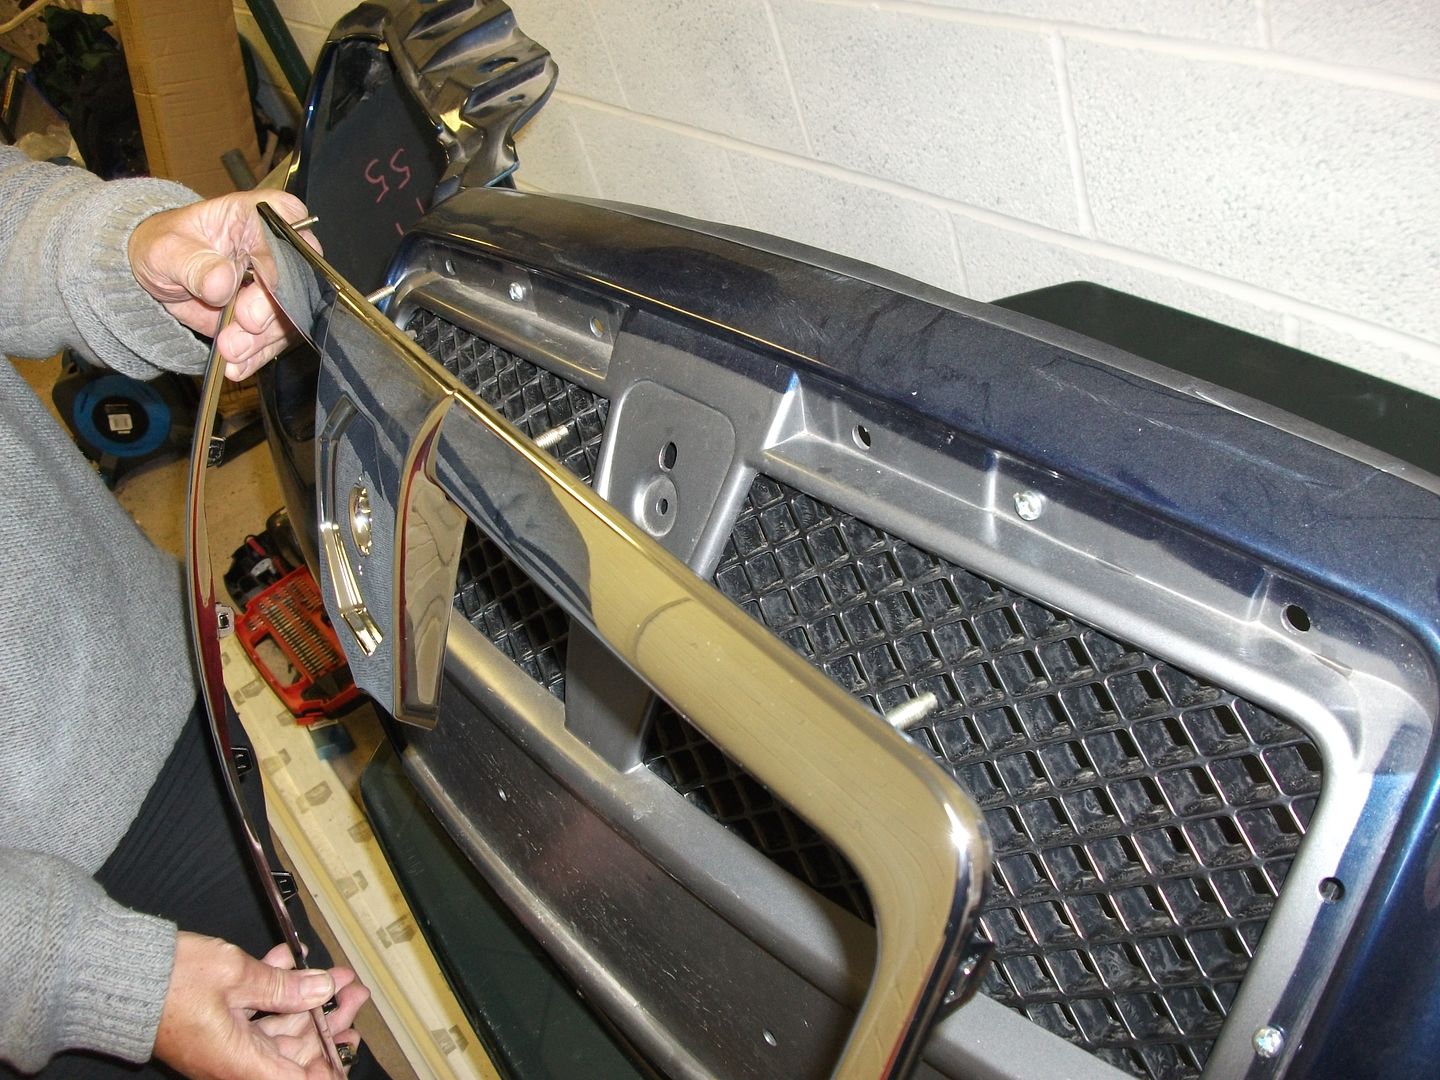
The chrome grille can now be offered up to the bumper. It has four locating bolts on the back which line up with the top of the bumper and can be secured loosely with nuts and washers on the back
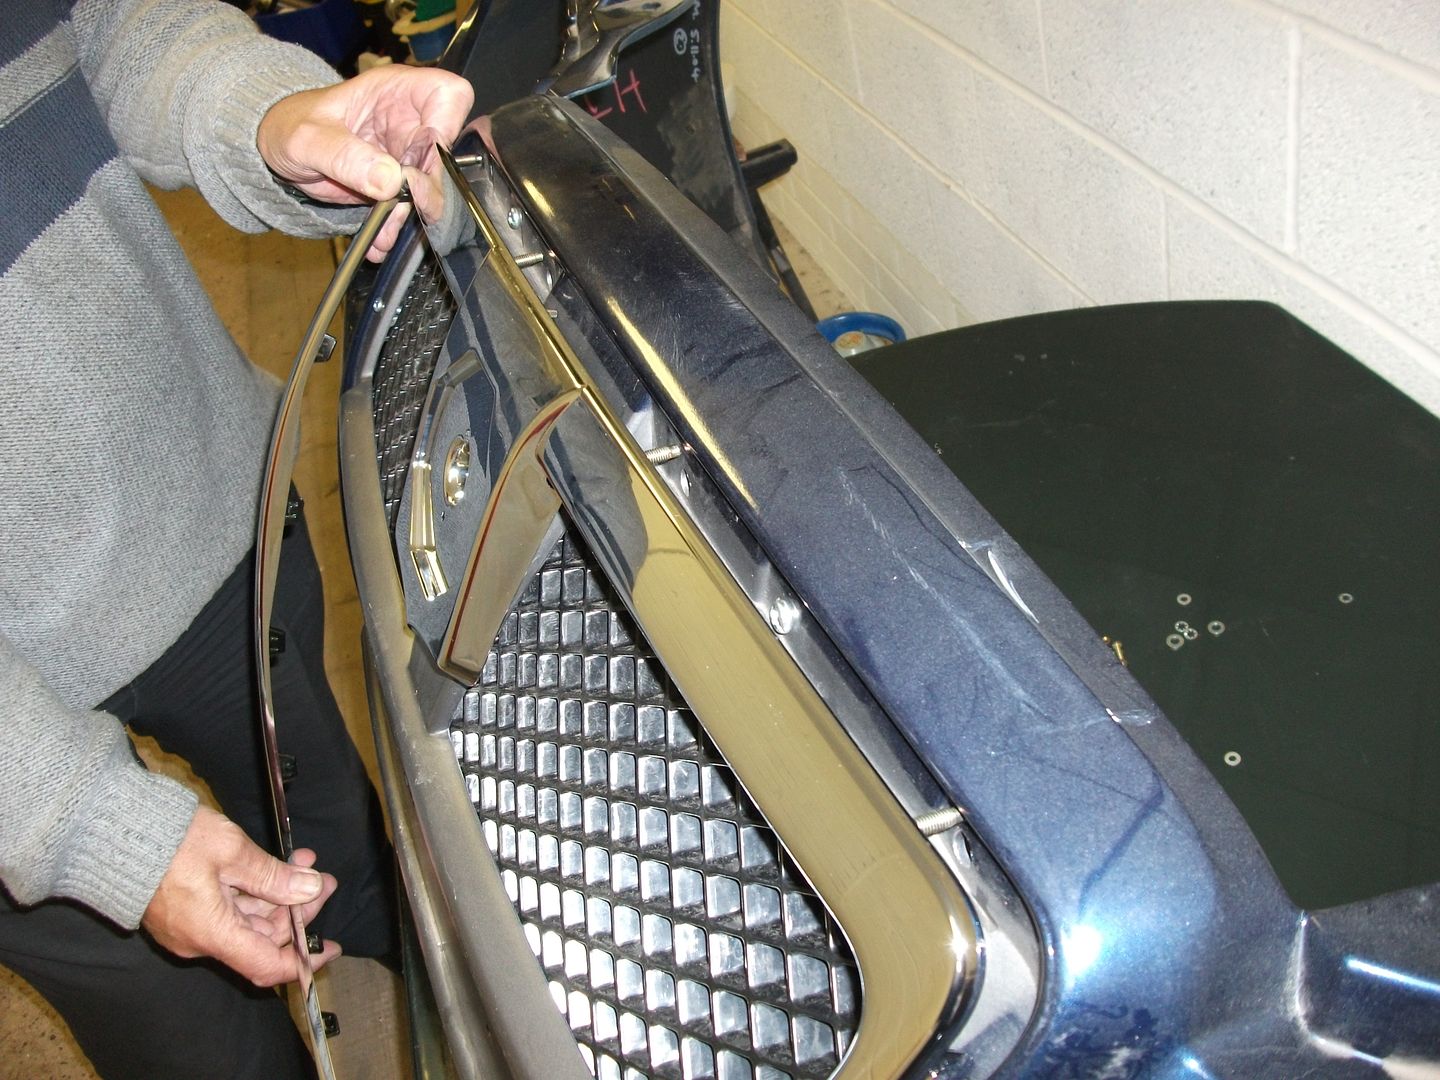
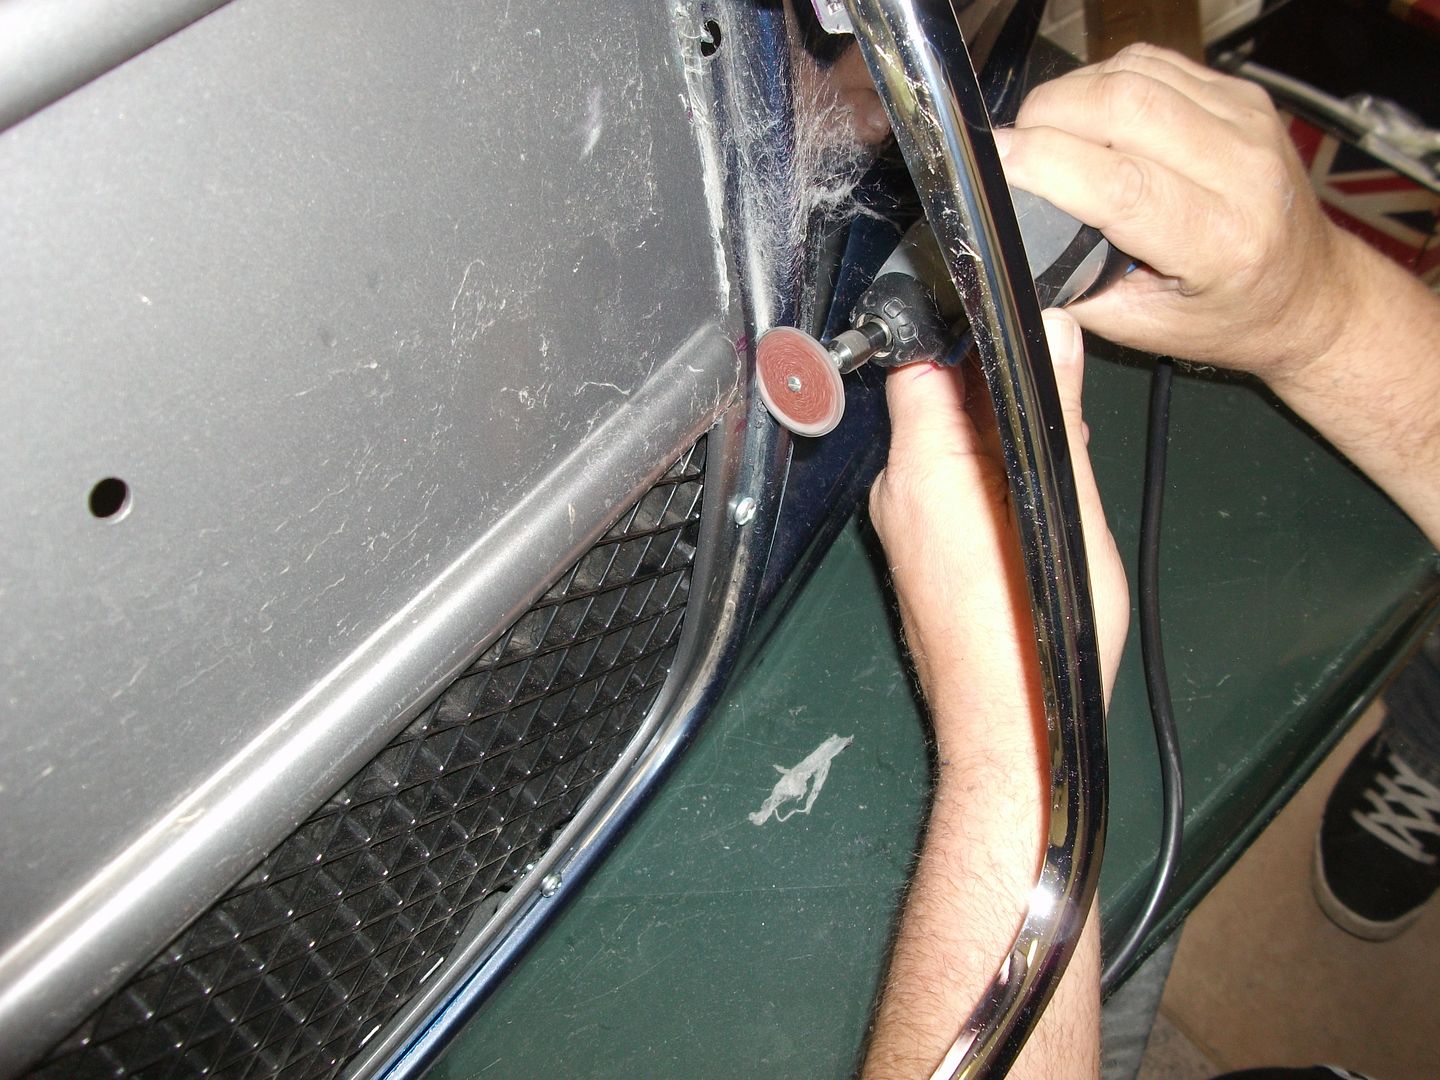
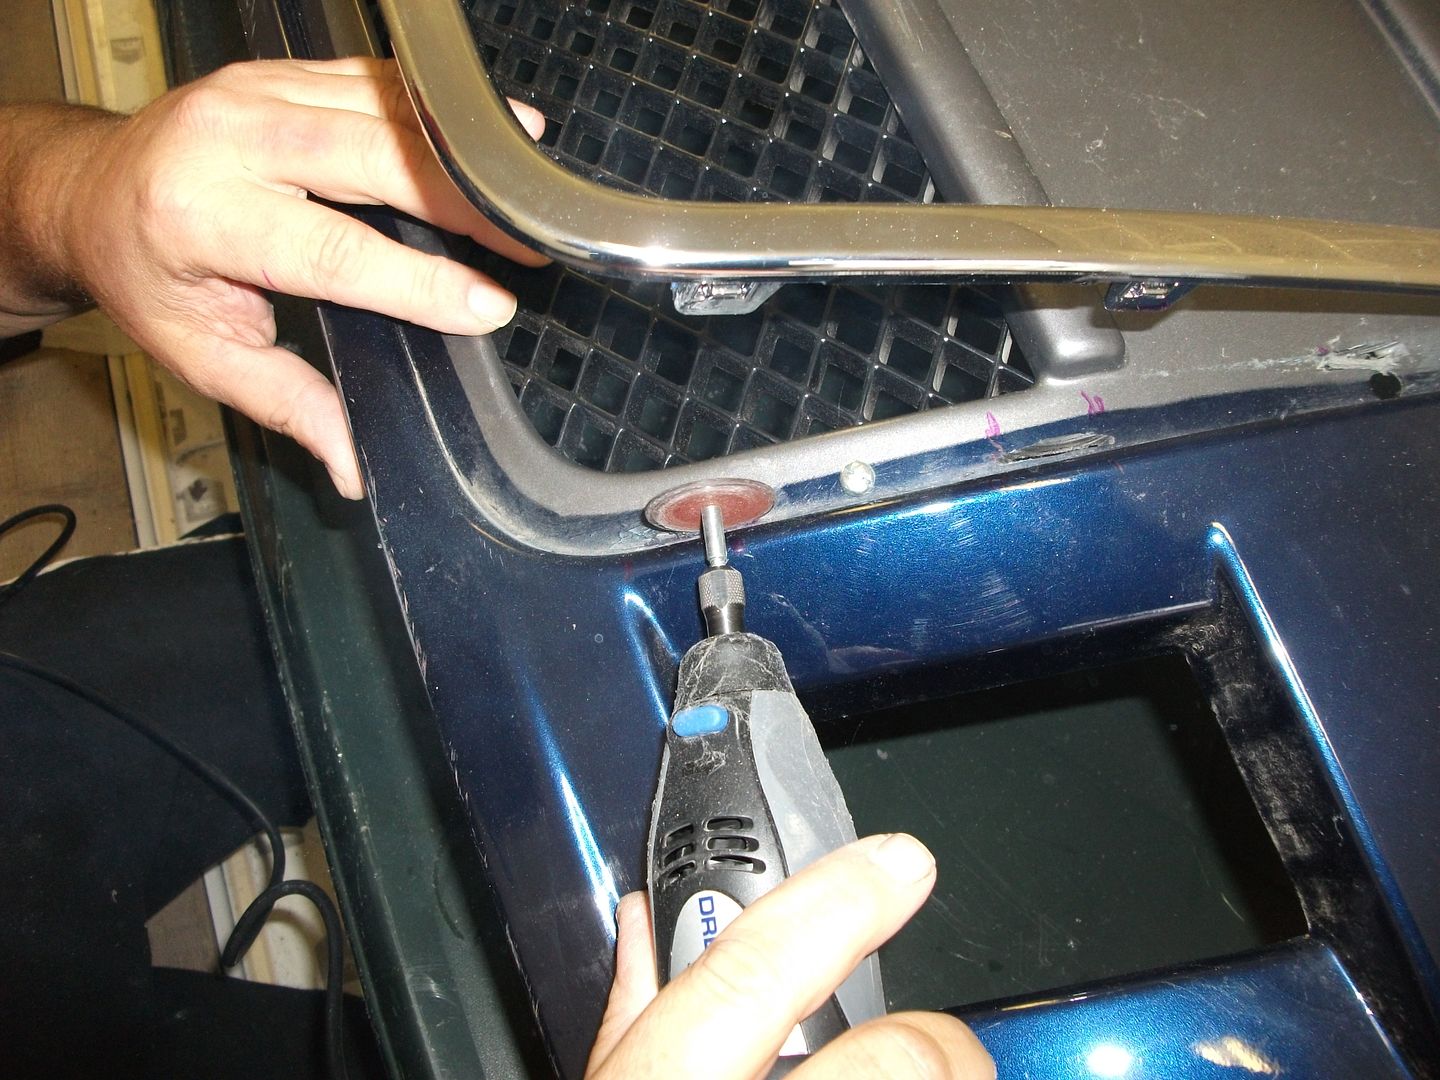
The chrome grille has securing lugs at various places all around its edge and there are no corresponding slots in the original bumper to locate these so you need to use a dremmel with a cutting wheel to make the slots
With the top still secured press the chrome grille into the bumper and working from the top downwards mark where the slots are needed and dremmel them out
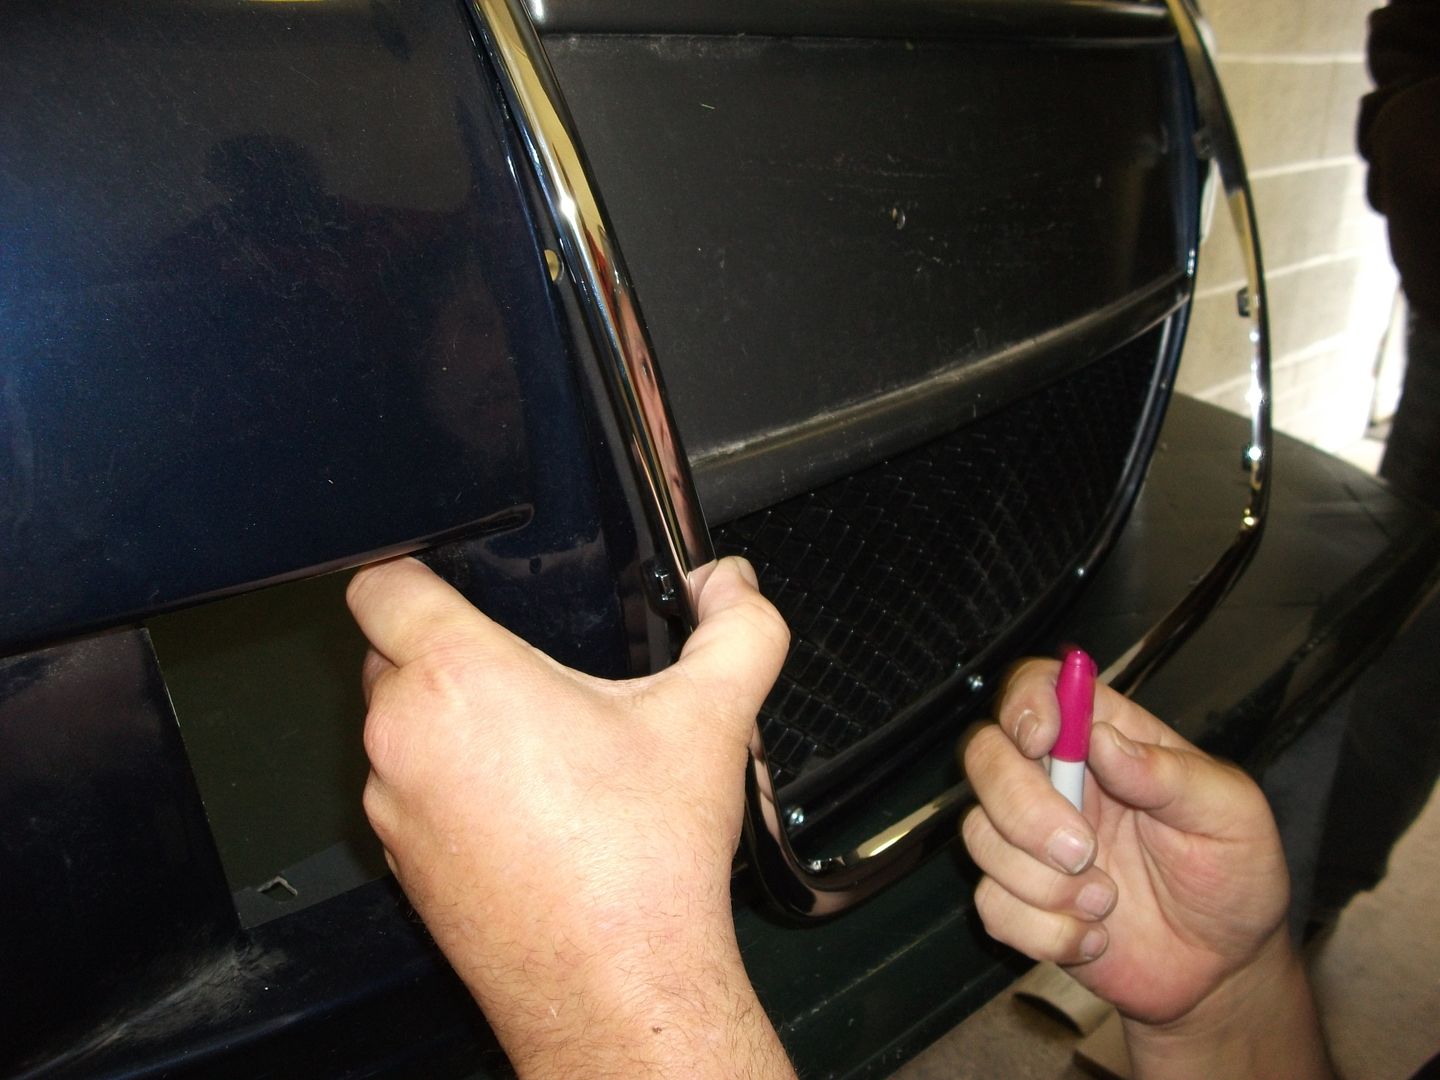
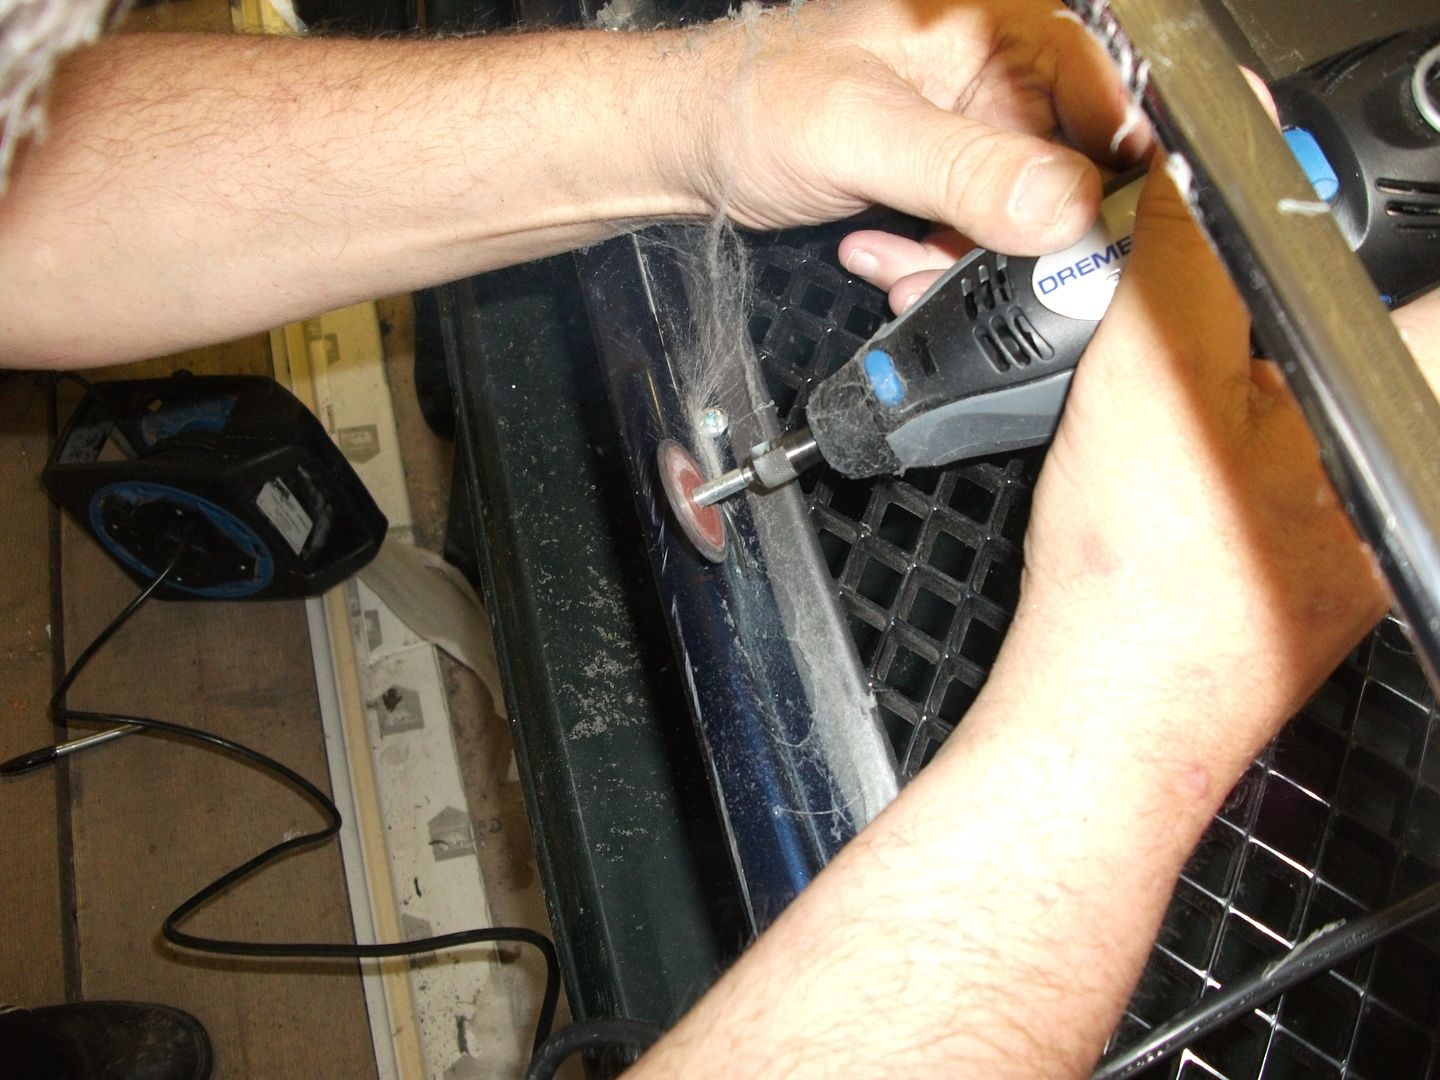
The bottom edge of the grille has too many lugs on and some can be dremmeled off to make life a bit easier
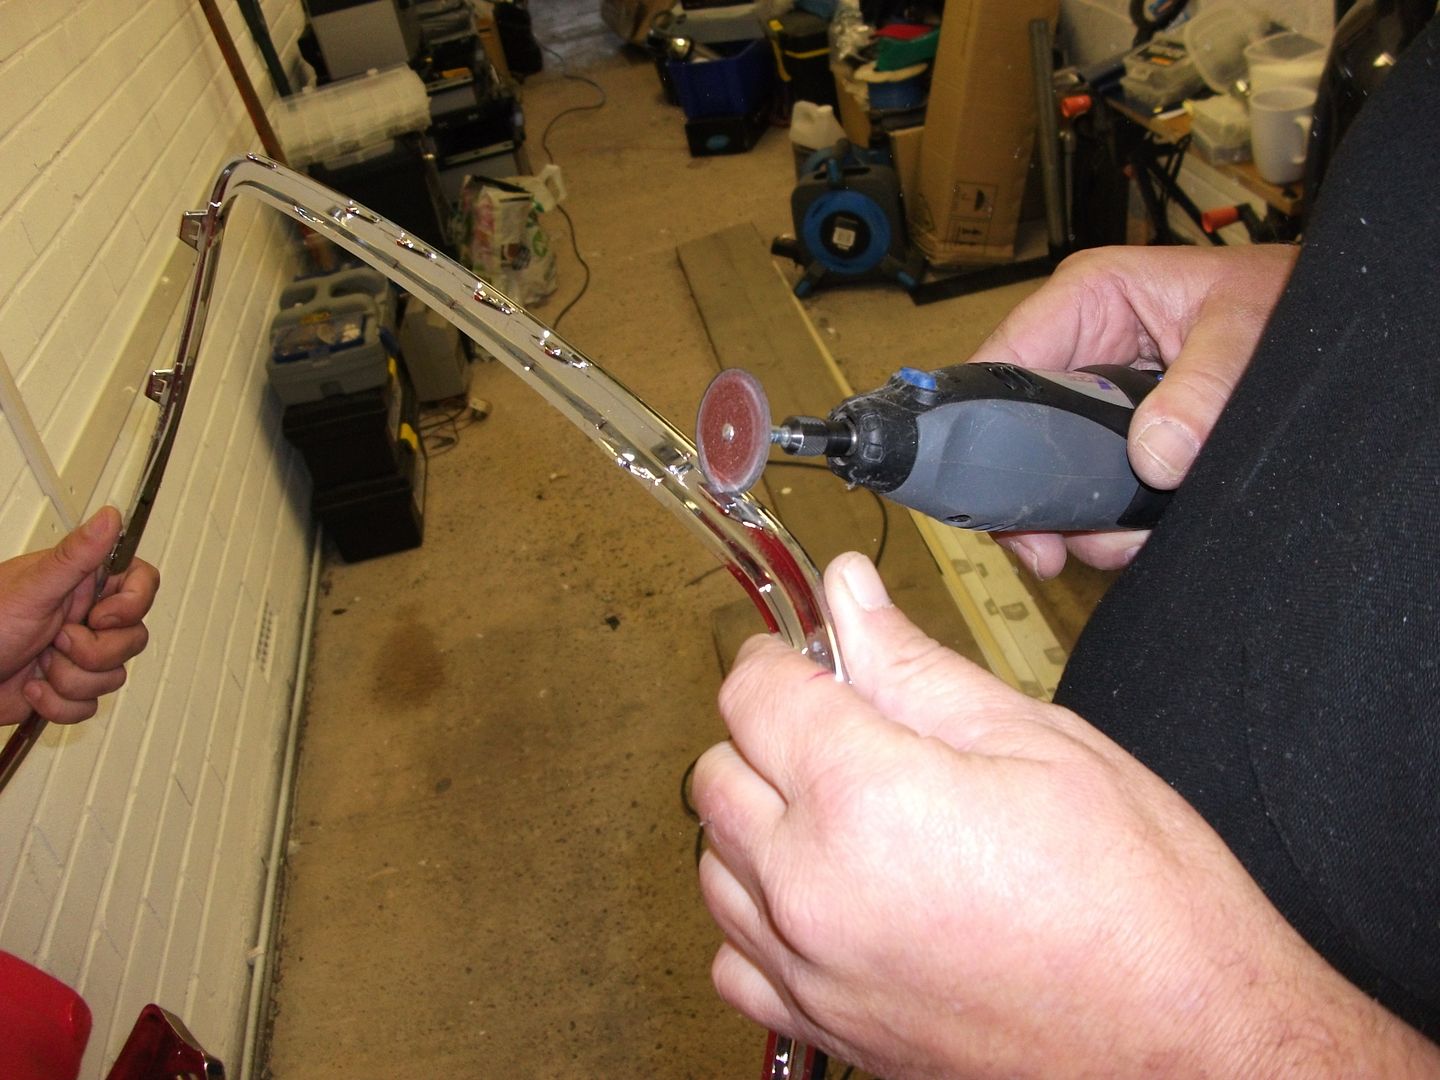
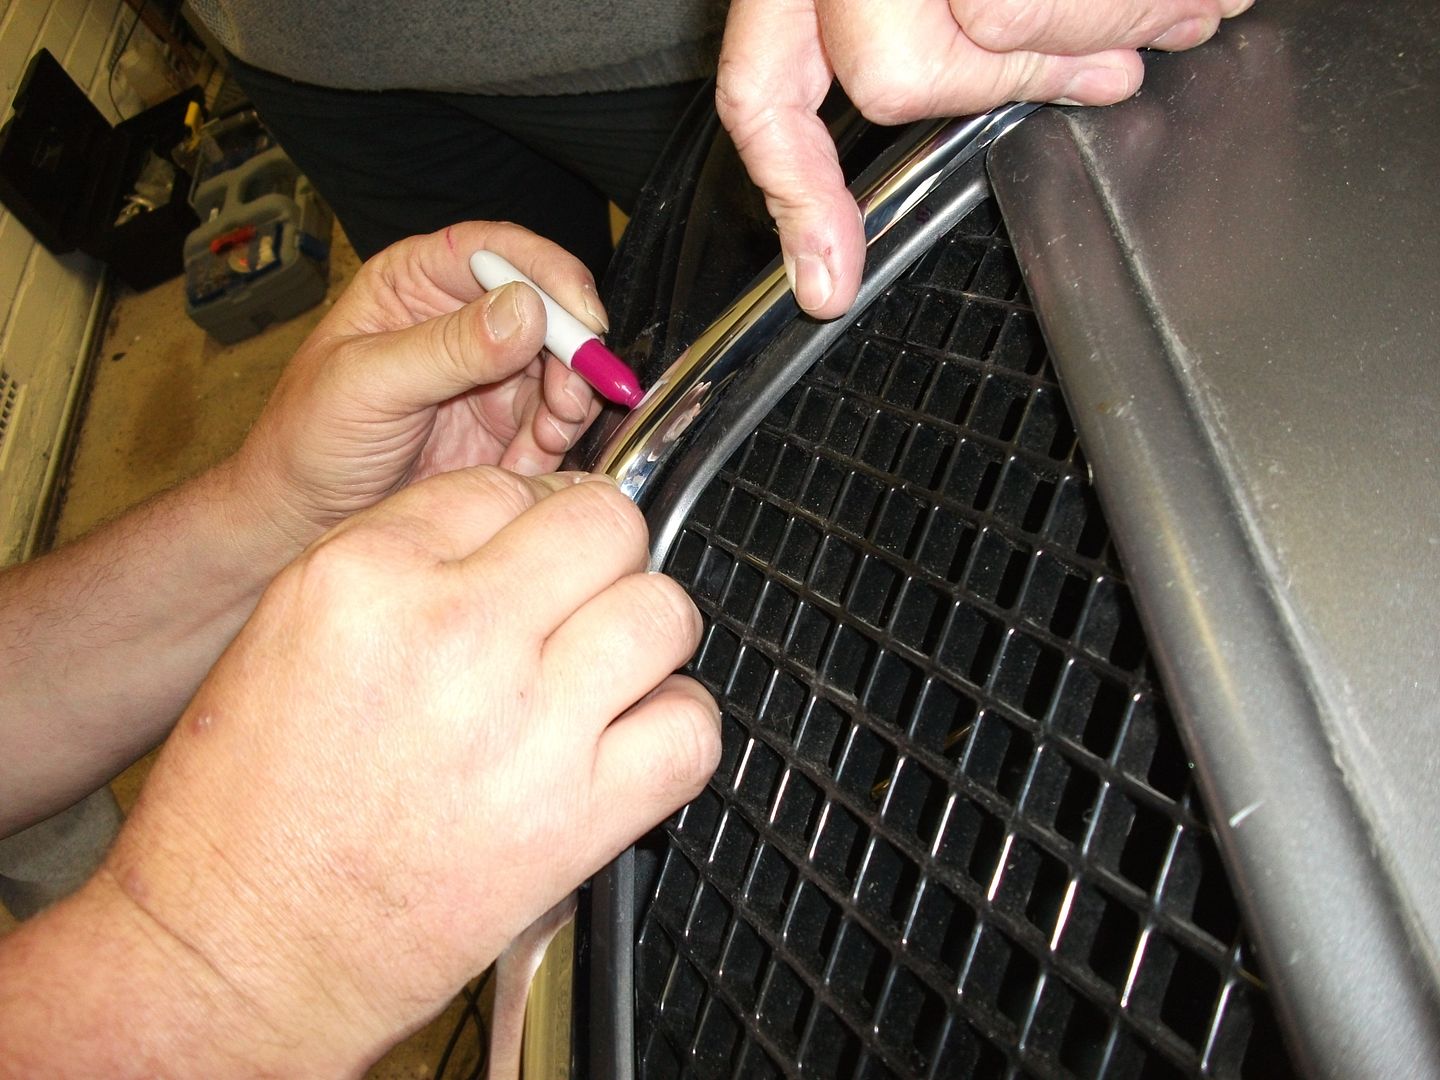
Once you have made some slots continue working downwards pressing the lugs home and marking the next ones ready for dremelling until you get to the bottom of the chrome grille to finish off
Once all the slots are made and the grille pushed in place it will look like this
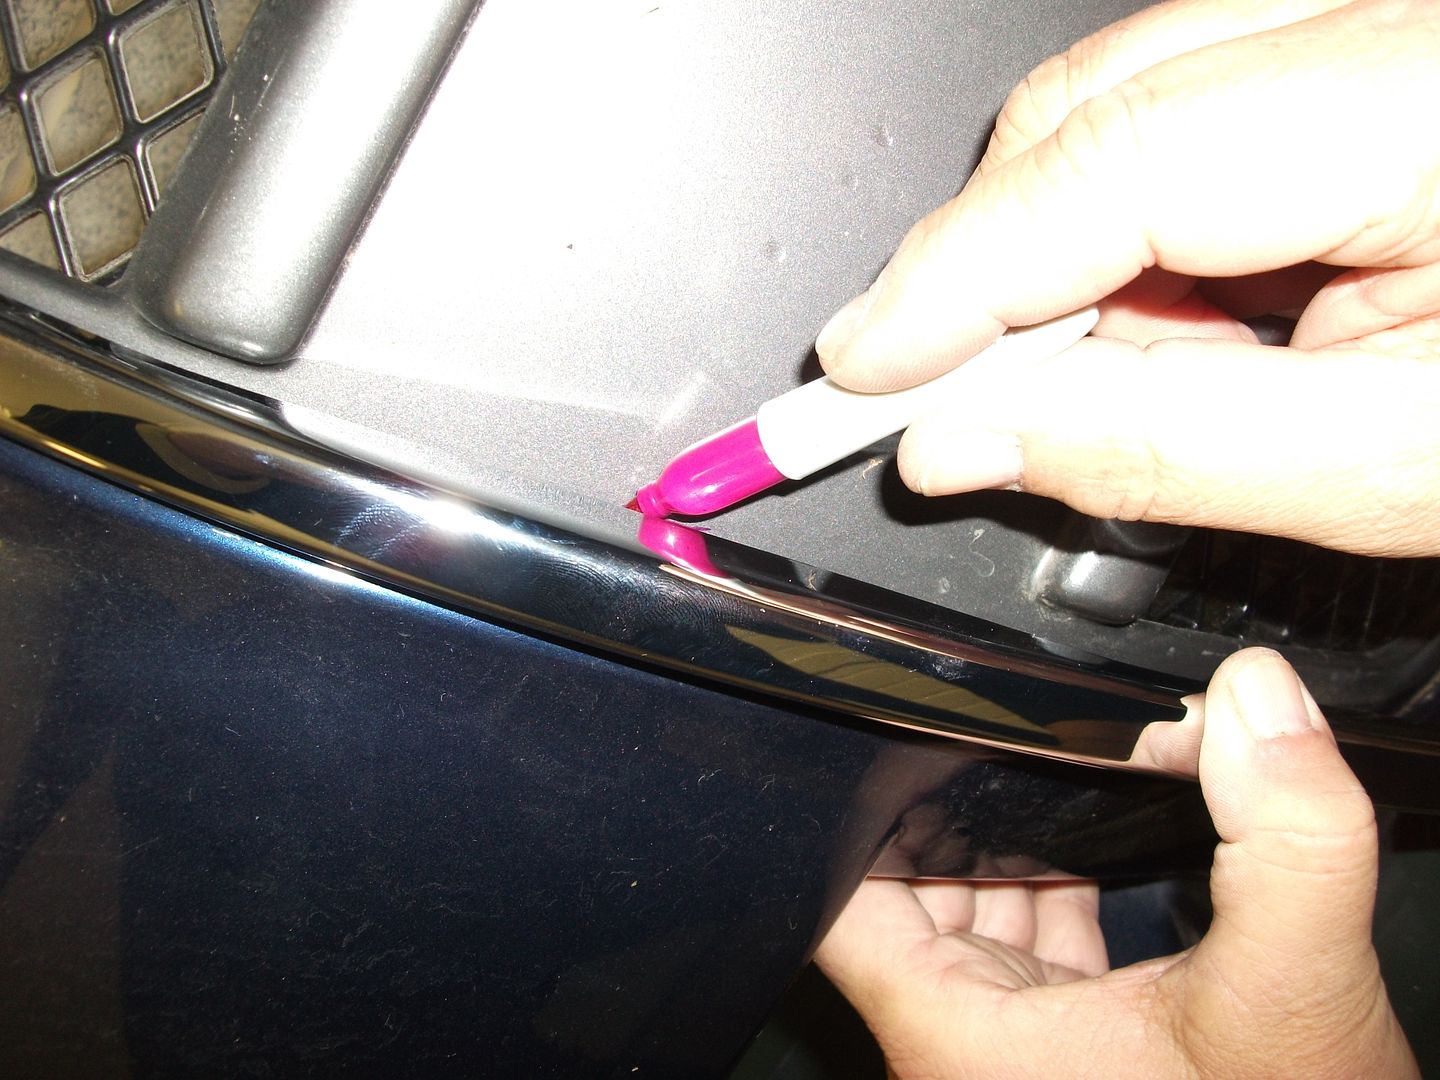
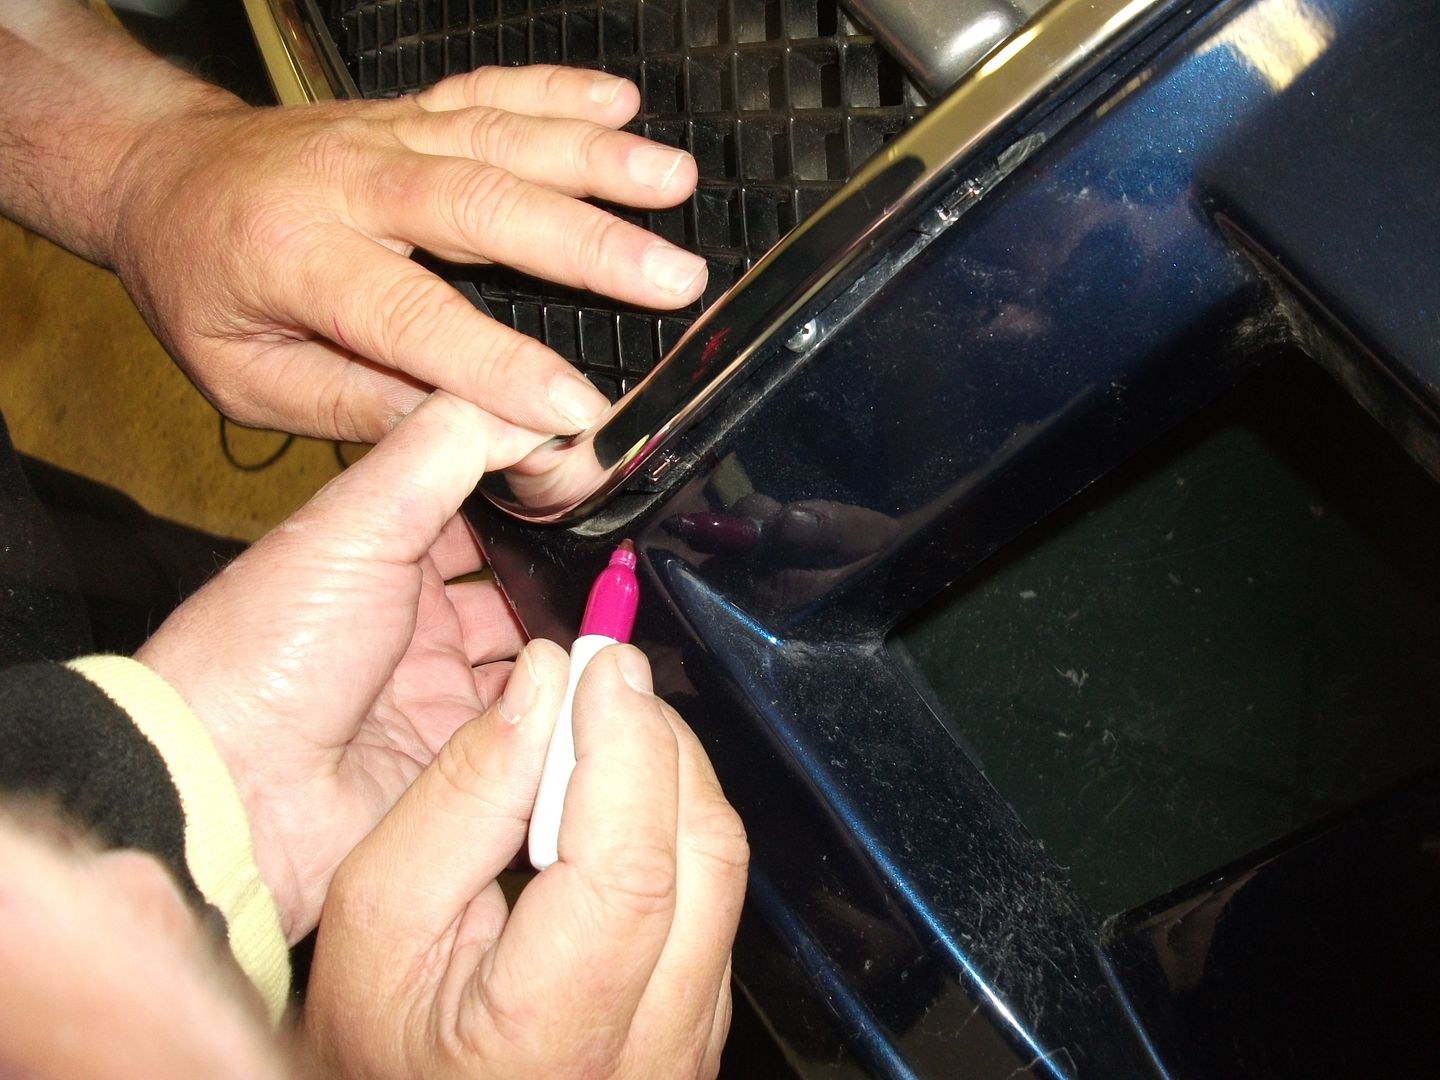
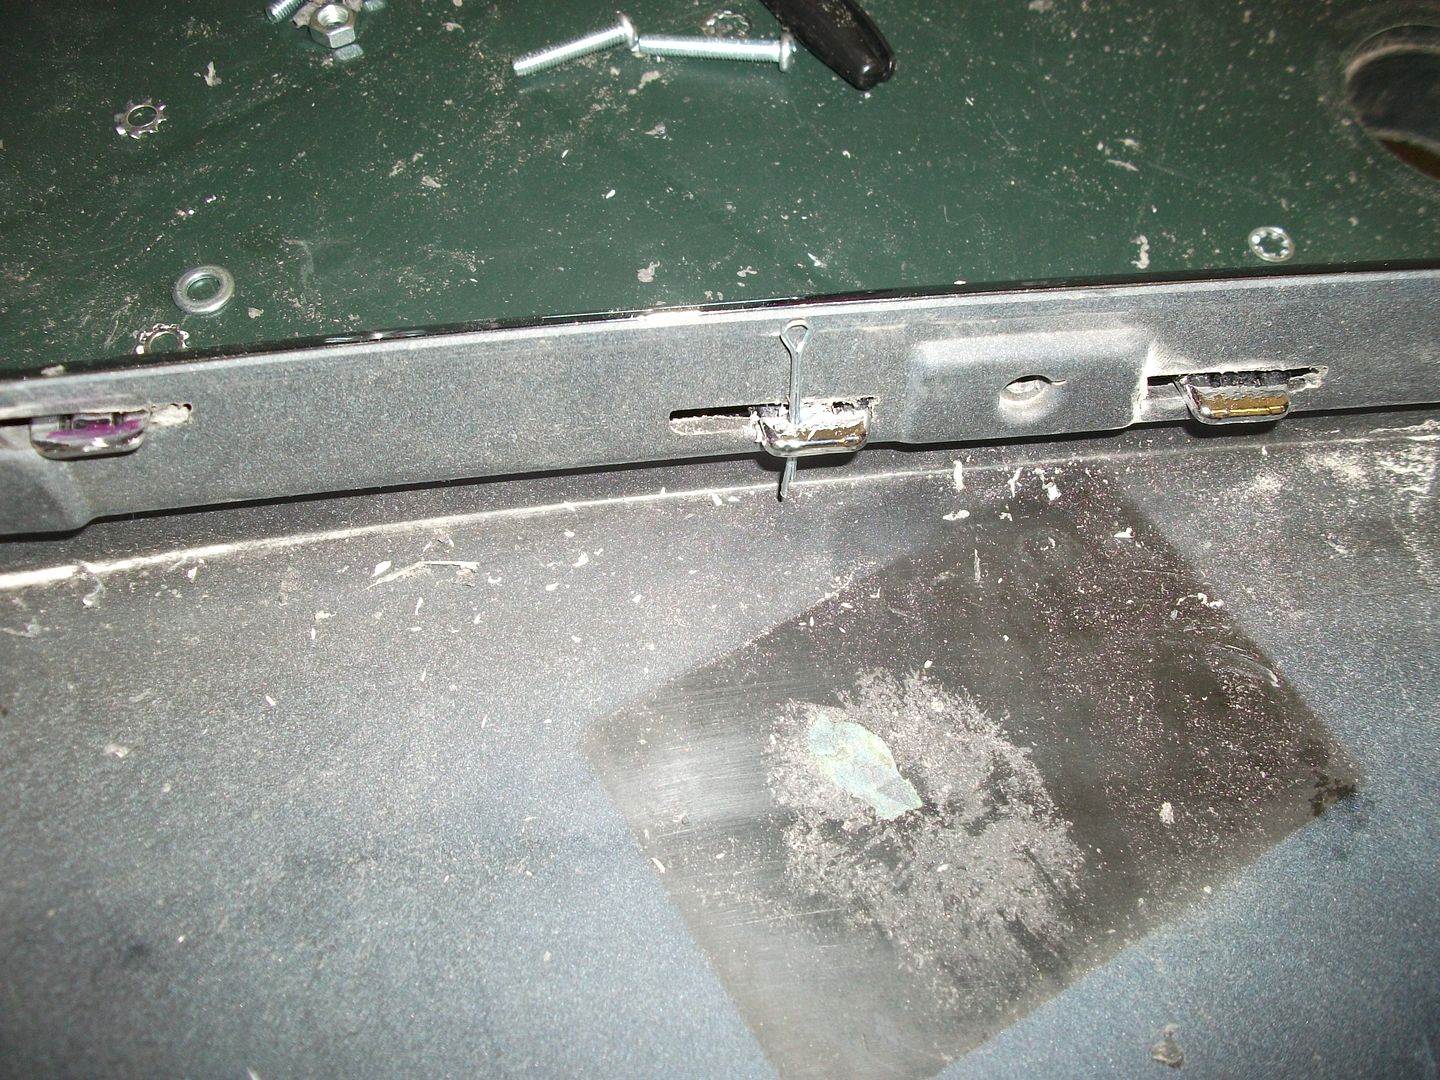
Next you need to secure it to the bumper, so you will need to push each lug fully home and mark for a small drill hole which will be easier to drill with the grille then pulled back from the bumper.
Drill a small hole to take a cotter pin, and do this all around. This will also enable easy removal of the grille should you ever need to do so
As far as the grille badge is concerned, the bespoke Rover option is available via me as below
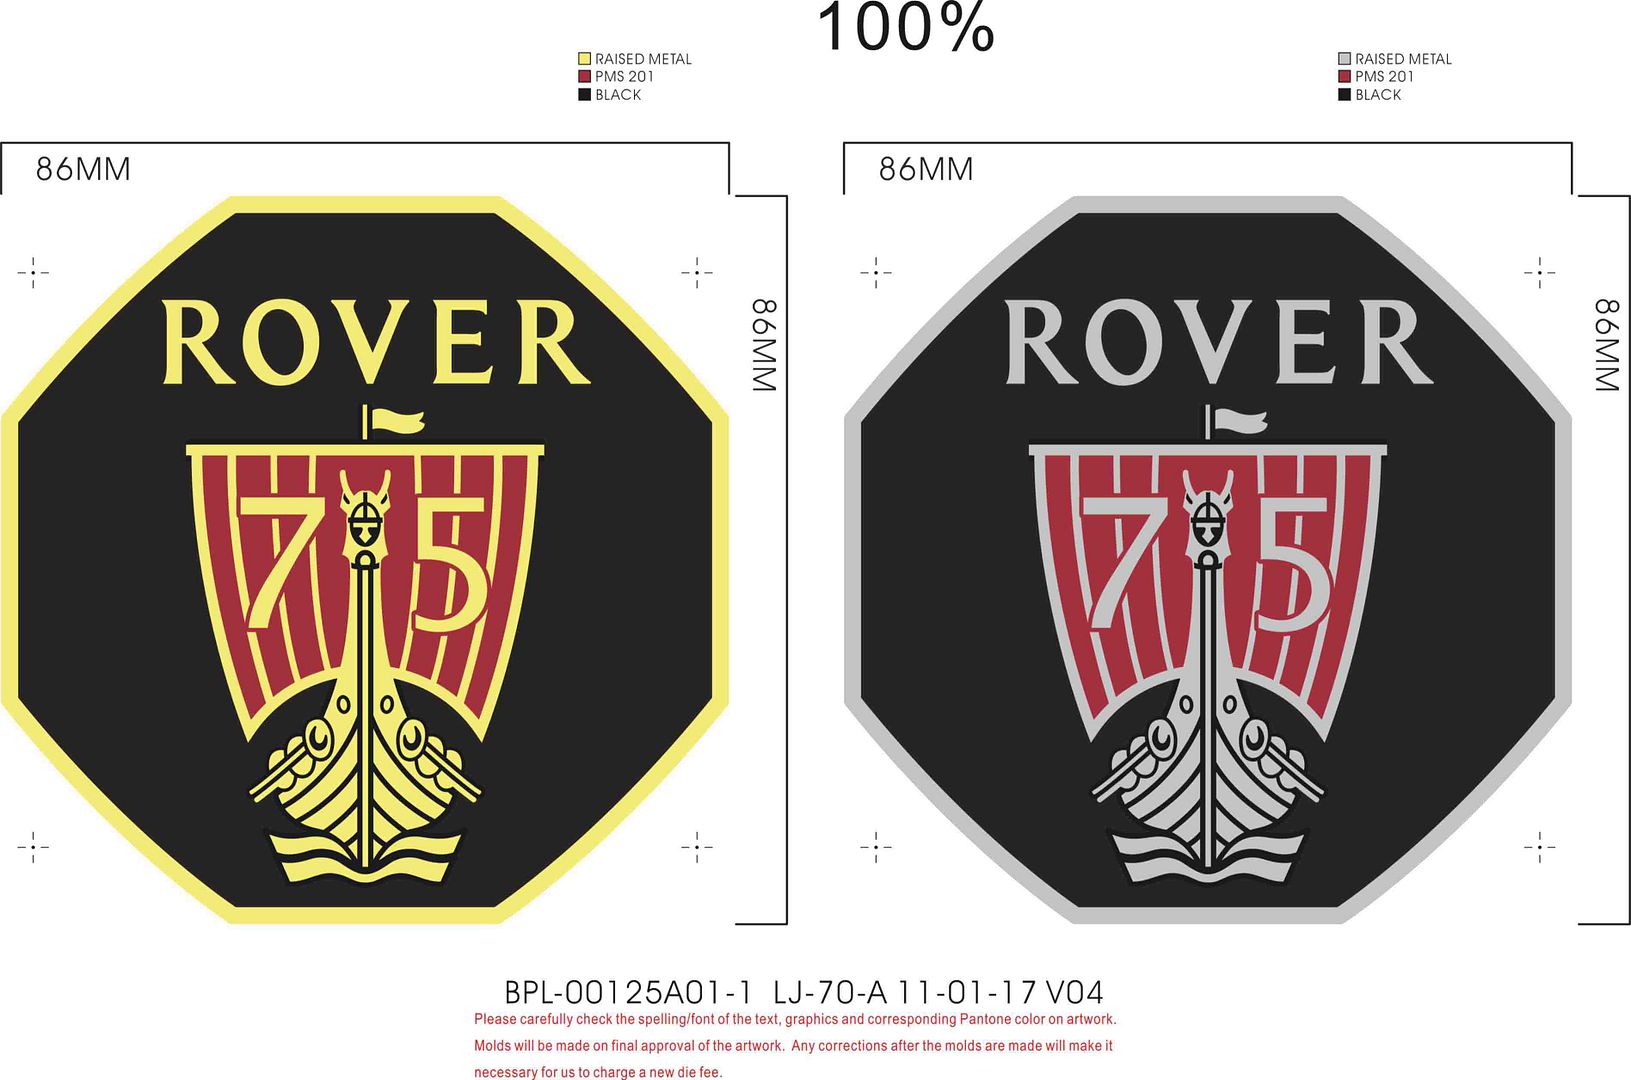
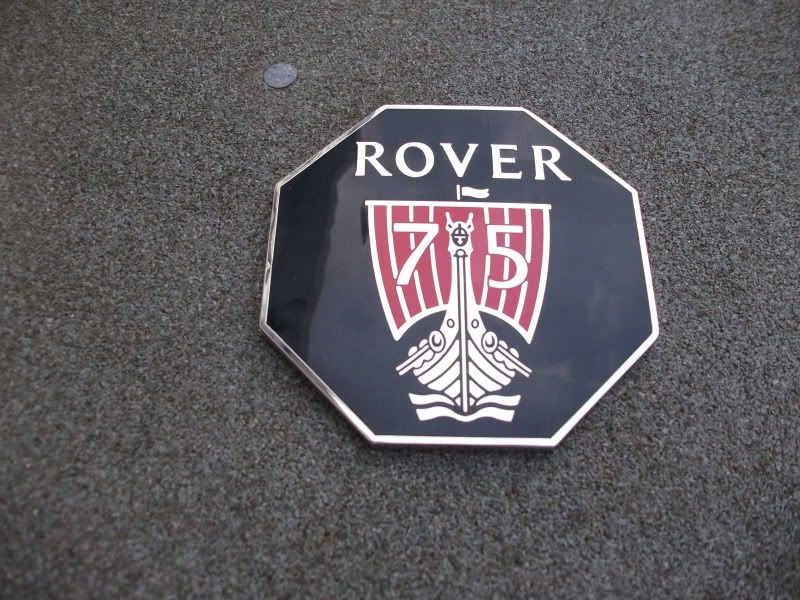
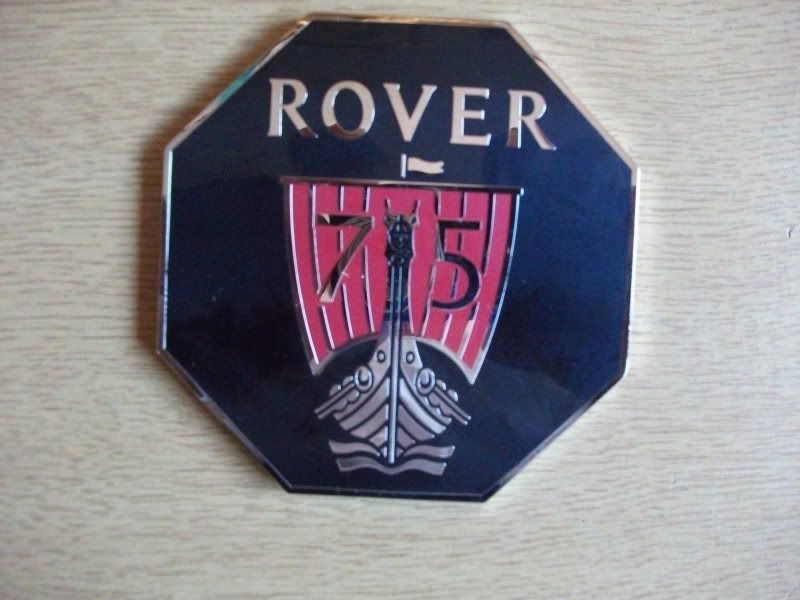
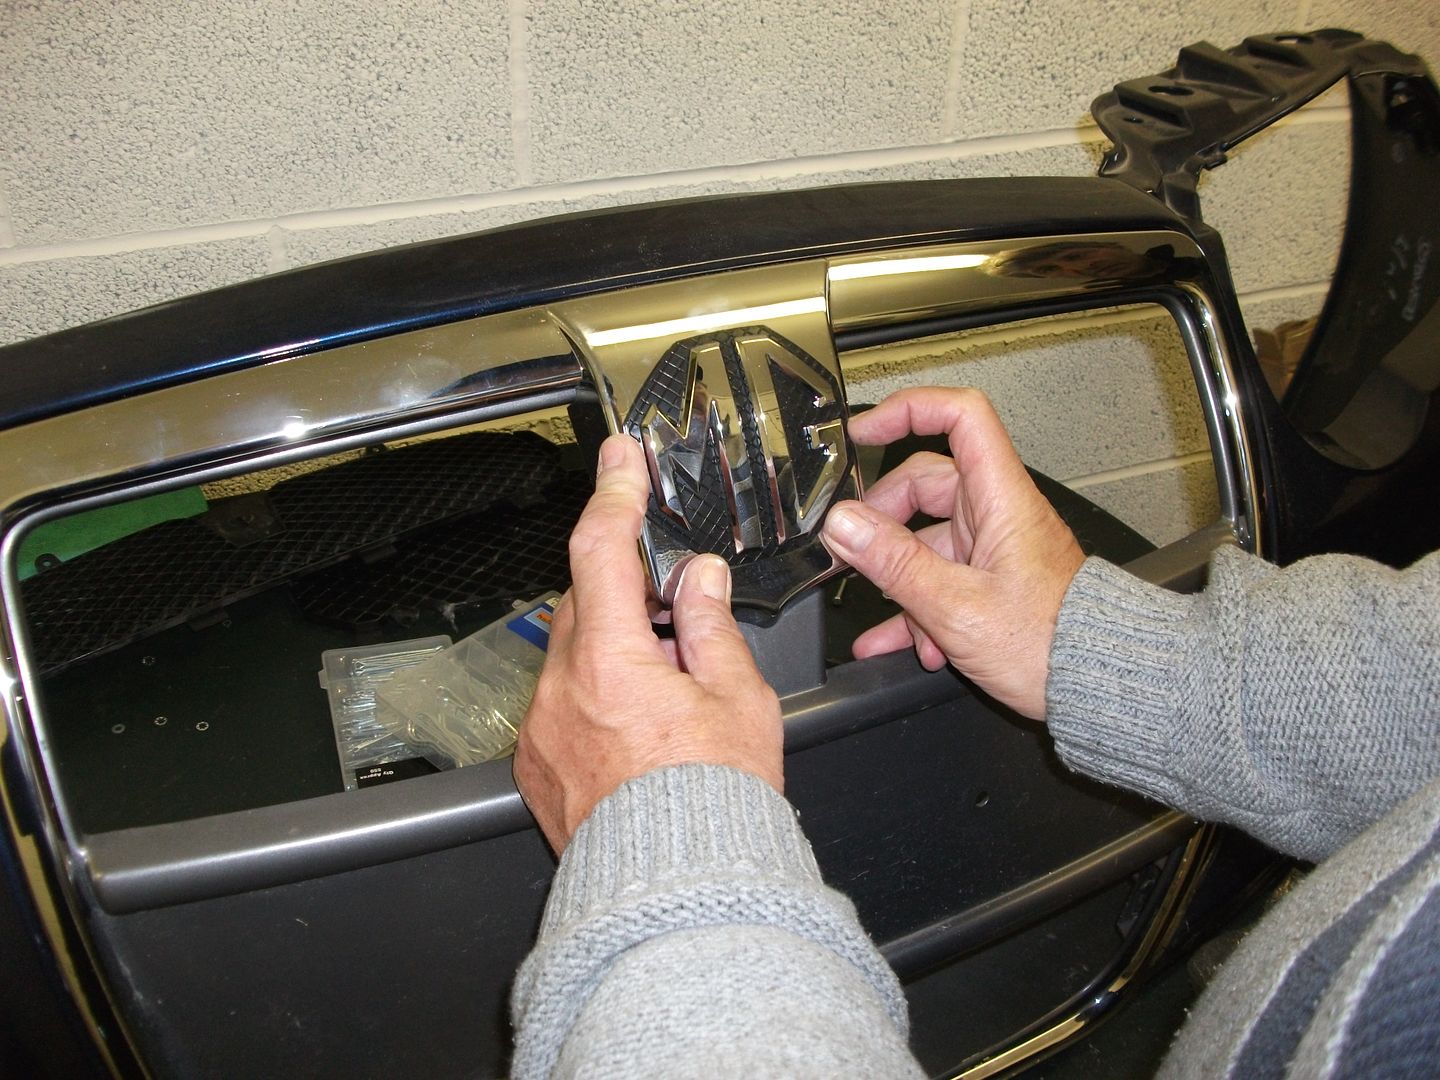
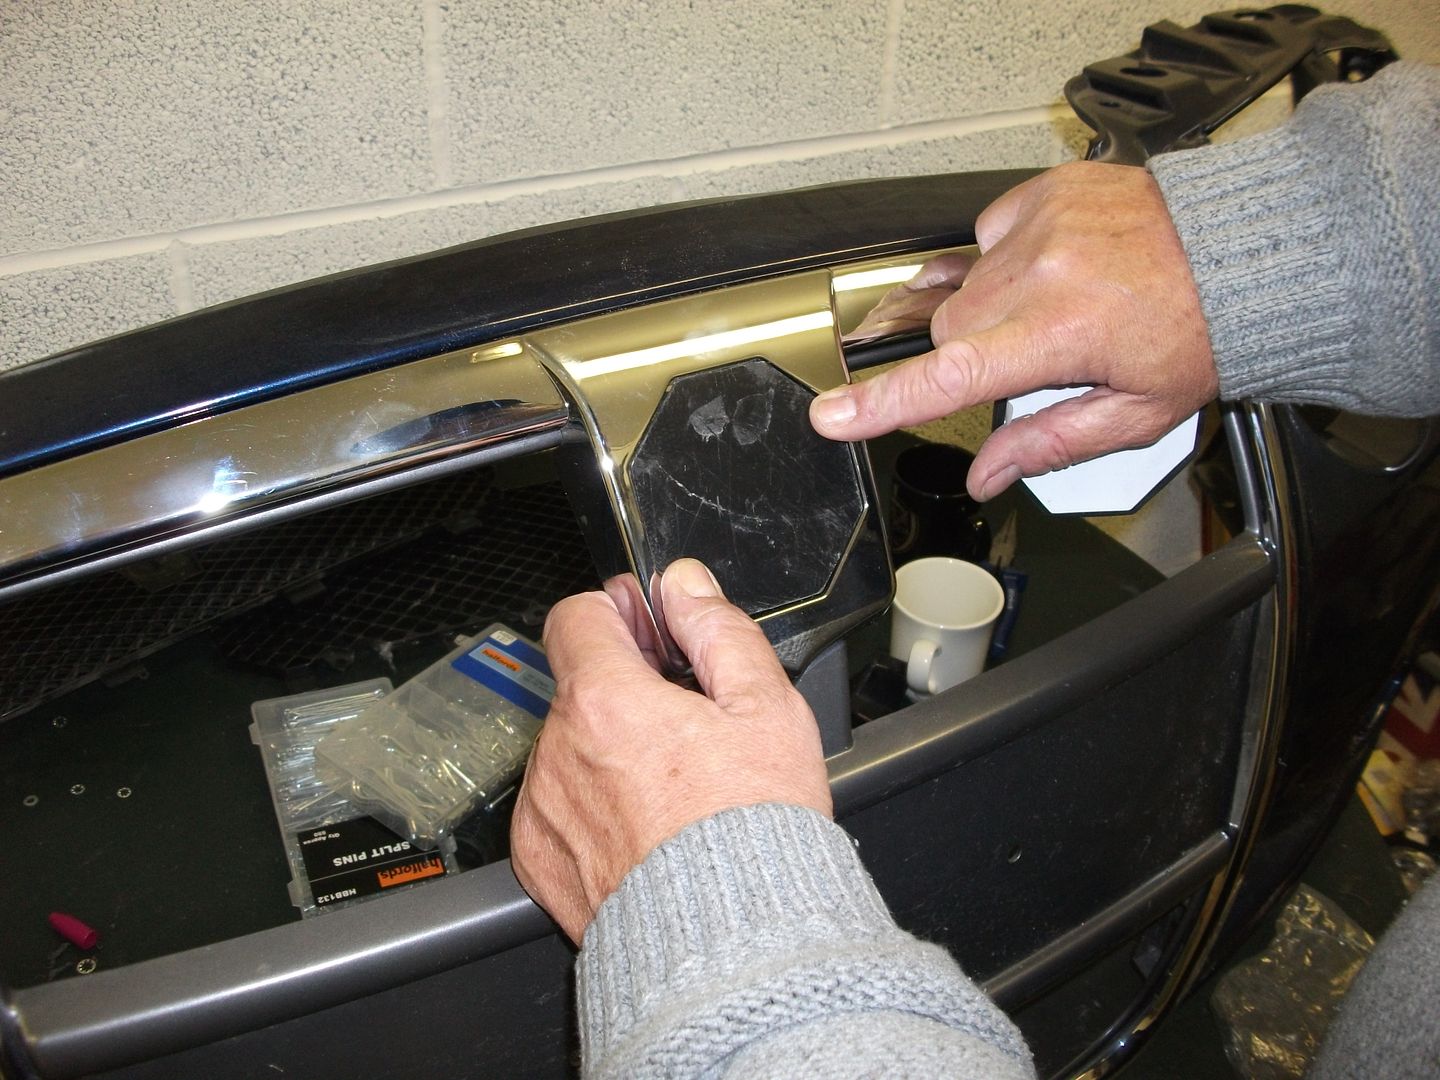
or if you have an MG then there are alternatives. This badge is the one Rob intends to use but is slightly bigger than the recess and will need the edges filling down, cut out a blank the same size as the recess and place this on the badge to mark where it needs to be filed.

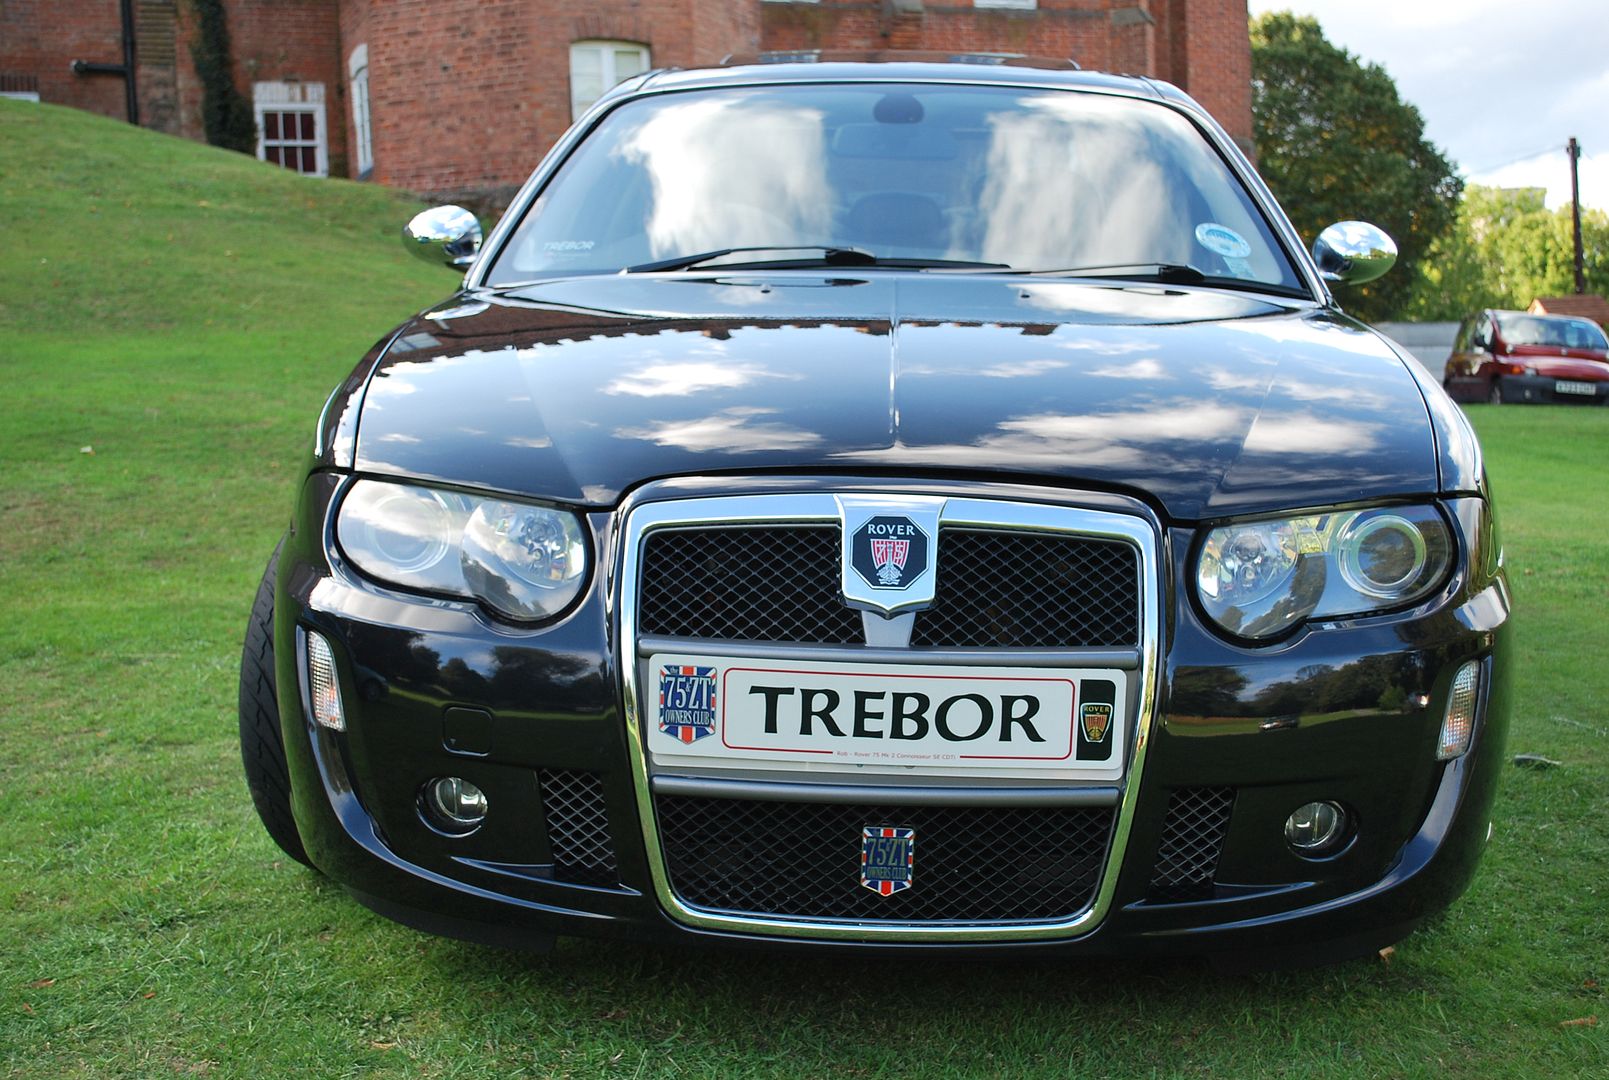
The bumper is now off for spraying and will be fitted at the next nano meet and when finished will look something like this
Good luck if you intend to do this mod and don’t forget help and advice is available from existing members who have already done it, just get in touch
Cheers
Trebor
It gives added detail and pictures to the other excellent how to done by Devilish on this forum " Premium-MG7-Roewe750-Bumper-Supplier-and-Fitting-Guide " which you may also wish to refer to
premium-mg7-roewe750-bumper-supplier-and-fitting-guide-t2819.html
With thanks to Devilish for providing his garage, and Woolleysox for letting us use his bumper and grille for the pictures.
Sourcing all the bits you need for the bare bumper can be a stumbling block
First of all a couple of pictures of the hard to get fog mounts for the bumper, which are not normally in place when you buy a bare bumper unless you are lucky. Rover breakers at Middlewich have one side only for sale, and some members intend to fabricate their own although I don’t believe as yet anyone has done so
The fir tree clip brackets are also usually missing from the bare bumper although these are still available from Rover Breakers at Middlewich
Next the blanking plates that sit underneath the indicators but as these are a flat fit at the back and other plastic could be used or even mesh
You will need MK2 fog lights to sit in the fog mounts
And the plastic section that fits in the top of the bumper ( available from Lakeland Minis )
The Mg 7 Grille comes with all 4 plastic grilles that sit behind the bumper, this is the chrome outer grille
and these are the 2 larger plastic bumper mesh grilles
The plastic bumper mesh grilles are easy to fit as follows:
The lower grille will fit into the bumper once the marked holes in the bumper are drilled, use small nuts and bolts ( brass best ) with washers to secure the grille, the bolt is visible from the front of the bumper but will be covered by the chrome grille when fitted
The top grille will fit straight in without any drilling and will be secure enough without making any extra holes at the bottom of it
With both grilles fitted they look like this on the inside
And like this from the front, note the visible bolt heads that will be covered by the chrome grille when fitted
The smaller grilles that sit next to the fog lights have 2 locating holes, one fits into a bracket already in place on the bumper and the other via a self tapping screw into a corner of the fog mount. If your bumper does not have the metal bracket than it will be easy to fix this in place by making a bracket or maybe glueing
The chrome grill is a bit more tricky as although it fits the bumper perfectly size wise some of the fixings are different
The back of the grille top will not fit the hole in the bumper so to get a perfect fit use the right size hole cutter to make the hole in the bumper bigger
It now looks like this with the hole cut out
The chrome grille can now be offered up to the bumper. It has four locating bolts on the back which line up with the top of the bumper and can be secured loosely with nuts and washers on the back
The chrome grille has securing lugs at various places all around its edge and there are no corresponding slots in the original bumper to locate these so you need to use a dremmel with a cutting wheel to make the slots
With the top still secured press the chrome grille into the bumper and working from the top downwards mark where the slots are needed and dremmel them out
The bottom edge of the grille has too many lugs on and some can be dremmeled off to make life a bit easier
Once you have made some slots continue working downwards pressing the lugs home and marking the next ones ready for dremelling until you get to the bottom of the chrome grille to finish off
Once all the slots are made and the grille pushed in place it will look like this
Next you need to secure it to the bumper, so you will need to push each lug fully home and mark for a small drill hole which will be easier to drill with the grille then pulled back from the bumper.
Drill a small hole to take a cotter pin, and do this all around. This will also enable easy removal of the grille should you ever need to do so
As far as the grille badge is concerned, the bespoke Rover option is available via me as below
or if you have an MG then there are alternatives. This badge is the one Rob intends to use but is slightly bigger than the recess and will need the edges filling down, cut out a blank the same size as the recess and place this on the badge to mark where it needs to be filed.
The bumper is now off for spraying and will be fitted at the next nano meet and when finished will look something like this
Good luck if you intend to do this mod and don’t forget help and advice is available from existing members who have already done it, just get in touch
Cheers
Trebor
Robs Pictures at :
Robs Car Gallery
click below to access nano website

Planning is an unnatural process, much better to just get on with things, that way failure comes as a complete surprise instead of being preceeded by a period of worry and doubt
Robs Car Gallery
click below to access nano website
Planning is an unnatural process, much better to just get on with things, that way failure comes as a complete surprise instead of being preceeded by a period of worry and doubt