Headlights by PaulT


PaulT
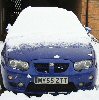
Phoned this morning to book an MOT 'can do it at 15:30 this afternoon'. Had enough time to finish the various things I was doing prior to it going in. However, the headlight lenses were not that good so I tried Brasso which did not have much effect. So I pulled the bumper off and fitted a spare that I had to the o/s as that one was the worst but the spare one is not that brilliant.

It failed as the beam from the 'new' headlamp was well out. Checked the dipped bulb which was not seated properly and a pass.

The lens on the one I took off seems quite etched - perhaps the cow excreta that from a lane I regularly use. The lenses have clips to hold them on but seem to be stuck down. Anyone ever taken a lens off and if so how are they fixed.

Any tips on polishing the lenses - it would seem that I will need to be brutal and then use finer and finer 'polish'.
Paul

That apart Mrs Lincoln, did you enjoy the play

Image

Posted 20 Apr 2015, 17:37 #1 

User avatar
raistlin
Rob (Trebor) polished my headlight lenses at a nano-meet some time back Paul and made a superb job of them.

I didn't see exactly how he did it as I was involved in the T4 (Testbook version 4.Computer Diagnostic System) side of things but I feel sure he will advise.
Paul

Cogito ergo sum... maybe?

Click the image to go to Nano-Meet Website
Image

Posted 20 Apr 2015, 18:58 #2 

Last edited by raistlin on 20 Apr 2015, 21:15, edited 1 time in total.


PaulT
Thanks Paul
Paul

That apart Mrs Lincoln, did you enjoy the play

Image

Posted 20 Apr 2015, 20:59 #3 

User avatar
Zeeblum
I've recently refurbished the headlights on both my zt and ztt with a Meguiars 1 step kit that I bought from Halfords.
The kit comprises of:
1 bottle of liquid
2 sanding pads (4 grades)
1 woollen pad (to use with drill)

The kit:
http://www.ebay.co.uk/itm/like/16084687 ... 108&ff19=0

I think the pads go from 2500 grit all the way up to 4200 grit. I started sanding my lenses with a rougher grade, 1500 then 2000 and then moved on to the pads. After about 10-15 mins sanding with each grade, the lights had a wonderfully even mistiness that disappeared after using the woollen pad and cream.
My neighbours thought I had sneakily fitted new lights. They looked new!!

I'll bring the kit to Mays meet and we can give your lights a birthday if you fancy. :)

Also, I had bought a pair of facelift projector headlights a month or so ago, but one came broken. This leant itself for project work. I thought I could make some light protectors from the old lenses.
So, I heated the body of the light where the lens is black tack sealed and using a huge flat head screw driver began prising the lens away from the body.
It takes a huge amount of patience and time but eventually I could get enough purchase to pull the lens away from the body. I've not got much further than that so far.
You might find this helpful:
https://www.youtube.com/watch?v=imIiglkq7HA

Posted 21 Apr 2015, 00:05 #4 


PaulT
Many thanks for that. Do not know if I can make the May meeting but I now know what to get.

Unsure whether some of the problem is inside the lens - wonder how the OH is going to take to me baking my headlights in the oven?

Would be nice to have decent looking lights.
Paul

That apart Mrs Lincoln, did you enjoy the play

Image

Posted 21 Apr 2015, 09:38 #5 

User avatar
Tootall
I did mine before my last MOT in November but they are already getting cloudy again, any one got any tips to keep them nice and clear(i have heard that once polished you remove the UV coating can this be replaced) ?
Ex-Longbridge track monkey.

Posted 22 Apr 2015, 16:34 #6 

User avatar
Duncan
I was concerned that polishing might remove a coating as I was sure someone had told me they were coated some years ago. However a plastics expert on one of the forums assured me that was talking rubbish. Of course it might have been an anti abrasive coating and I was wrong, but I'm sure I was told they were coated with something.
Image

Posted 22 Apr 2015, 17:37 #7 

User avatar
Trebor
As far as I am aware and there is plenty of agreement if you do a Google search there is a type of clearcoat covering on plastic headlights from the factory which is a uv protection. It gets cloudy with age and also suffers from the usual stone chips which is why your headlights go cloudy

This film has to be removed and it is not an easy job by hand but various grades of wet and dry will do it although far quicker with an electric sander and round pad, once it is removed there will still be fine scratches from the sanding which is in turn removed with a polisher, the kits you buy effectively do the same thing but it takes longer by hand

The headlights will then look like new, some people regularly wax them to keep a coating on them , others buy a protective film such as what is used to wrap cars to protect the paintwork, others have actually sprayed the lights with clearcoat once polished
Robs Pictures at :

Robs Car Gallery

click below to access nano website
Image

Planning is an unnatural process, much better to just get on with things, that way failure comes as a complete surprise instead of being preceeded by a period of worry and doubt

Posted 23 Apr 2015, 06:49 #8 


Top

cron